The original name for this dish was Sloppy Joe Squares. I almost made it into a pie, but then kept it in a casserole dish, therefore, I was going to call it a Sloppy Joe Casserole. BUT, it was totally encased in a crust, so I kept calling it a Sloppy Joe Thing. Dan then named it Sloppy Joe Roll, then Sloppyrole (as in sloppy joe casserole). We have yet to pick a name we really like, so for now, it's a Sloppy Joe Bake.
Sloppy Joes have never really appealed to me. As a child, I never ate burgers, sandwiches, or tomato sauce. I had my first spaghetti with sauce when I was 12, my first burger when I was 17, and the first sandwich I ever liked (other than PB & Fluff) was the Bacon Turkey Bravo sandwich at Panera Bread when I was 19.
I basically lived off of fruits, veggies, pasta and seafood as a kid...very little meat. How I lived without it I don't know....
When you eat almost anything under the sun and enjoy making creative dishes, it's not always easy to live with a meat and potatoes guy. I'm glad I could add this dish to a list of dinner recipes that we can both enjoy that doesn't consist of steak tips, rice and corn.
Sloppy Joe Bake
from Betty Crocker (long lost relative??)
1 lb. lean ground beef
2 canisters Big & Buttery crescent rolls
1 can sloppy joe sauce
2 cups shredded cheddar cheese
1. Preheat oven to 350.
2. Brown the ground beef in a skillet and drain. Add the sloppy joe sauce and bring to a slight boil for a couple of minutes.
3. Unroll a canister of crescent rolls and seal the edges together. Press into an ungreased 9x13 baking dish, pressing into the bottom and halfway up the sides. I had to tear off the end of the rolls and use pieces elsewhere to make it fit just right.
4. Pour the meat mixture over the rolls and top with shredded cheese.
5. Open the remaining crescent rolls and seal the edges. I took off two of the triangles and it fit just right on top of the meat and cheese. Try and seal up the top and bottom edges together as best you can.
6. Bake for 30-35 minutes until the dough is golden and cooked through.
Tuesday, July 24, 2012
Monday, July 23, 2012
Lasagna Stuffed Peppers
Lately, it's been pretty crazy, and cooking-wise, I've been pretty lazy.
So here's my number...call me maybe?
Damn that song!
Anyways, I figured I'd get back into cooking since I'm long overdue.
I was craving stuffed peppers today, and the best ones are the traditional ones my mom makes. But, instead of asking her to make them, which would mean an extra trip to grocery store and all, I figured I'd make them myself. But of course, when I make something, I tend to get all fancy and never settle for the basic way. I started looking up recipe ideas for stuffed peppers, and then I kind of got hungry for lasagna. I've been trying to be a little more healthy lately, so I thought, why not just put the lasagna ingredients inside of a pepper. Swap out the carb-heavy pasta for peppers. I'm a genius sometimes, I know.
I also already have something planned for tomorrow night with ground beef, so I went with lean ground turkey for these to make it even more healthy. I also had leftover pasta sauce in the fridge to use...it was quite a productive dinner - reducing calories, costs, and waste! I don't know why I'm so excited about this, but I am proud of myself when I use leftovers...they tend to sit in my fridge forever and then I get really frustrated when I see them and they've gone bad.
For the filling I used my go-to lasagna filling, minus the egg. Just ricotta, Parmesan, parsley, oregano, garlic powder and salt and pepper.
Lasagna Stuffed Peppers
from me!
3 large green bell peppers, halved lengthwise and cleaned out
1 lb. lean ground turkey
1 (15 oz.) container of part-skim ricotta cheese
1 cup fresh shredded Parmesan
1/2 tbsp. oregano
1/2 tbsp. parsley
1 tsp. garlic powder
salt and pepper to taste
2-2.5 cups of pasta sauce
1 cup of shredded mozzarella cheese
1. Preheat oven to 375 and grease a 9x13 baking dish.
2. Brown the ground turkey in a skillet and drain when finished.
3. In a bowl, mix together the ricotta, Parmesan, oregano, parsley, garlic powder, salt and pepper.
4. Pour the cheese mixture into the browned turkey and mix to combine.
5. Place a small scoop of turkey mix into the bottom of each pepper.
6. Top with about 1/4 cup of pasta sauce. Repeat layers.
7. Cover with foil and bake for 40 minutes.
8. Top each pepper with some mozzarella cheese and place under the broiler for about 2 minutes until cheese melts.
![]() |
| Sorry for the terrible range lighting... |
![]() |
| Repeat one more time... |
![]() |
| Yumminess. |
Tuesday, July 10, 2012
Homemade Tortilla Chips
Since I made my Shrimp Enchilada Bake yesterday, I had tons of leftover corn tortillas. They are sold in packs of 30...who is going to use 30 corn tortillas for one dinner? I figured I'd bake some and make them into chips instead of wasting them, like I always end up doing. It's quick, easy, and way healthier than fried chips.
Homemade Tortilla Chips
corn tortillas (I used 8)
salt and seasonings (optional)
1. Preheat oven to 425.
2. Stack tortillas and cut into quarters.
3. Spread out the pieces onto cookies sheets. Lightly spray each side of the tortillas with olive oil spray (or any cooking spray will suffice). If you want to use salt or seasonings, sprinkle them on both sides as well.
4. Bake for 5-10 minutes (watch closely!) until just lightly browned. The corners may curl up a bit.
Some good idea for seasonings would be salt, garlic, chile powder or chipotle rub! I made my plain so I could dip them in salsa.
![]() |
| Chips! |
Monday, July 9, 2012
Shrimp Enchilada Bake
First day of summer school is under the belt. It was chaotic, as there's always so much to settle once you get in there, but it went by quickly. It gets really hard to plan meals when I'm at work, because my classroom is on average 87 degrees, which makes popsicles and salads the only appealing foods. Then I come home to my central AC (oh, how I love thee), and want something warm.
It's Monday, so that means Dan is working tonight, which means I can make whatever I want because he won't be home for dinner. For some unknown and ridiculous reason, Dan doesn't care for Mexican food...who doesn't like Mexican food?!
Dan, that's who.
So, I used the opportunity to make a healthier enchilada bake. My ideal enchilada has shredded chicken or beef, an ungodly amount of cheese, and mole sauce. Are you starting to see why I chose a healthier version???? Anywho, this version is quick and simple with chopped shrimp, corn, chopped green chiles and some enchilada sauce. It's all baked between two layers of corn tortillas with a sprinkle of cheese on top. I probably could've had a smaller "sprinkle" of cheese, but let's be honest, the more cheese the better. So although I did put less than I wanted, it's more than the recipe called for I bet.
Shrimp Enchilada Bake
from Eating Well
1 lb. peeled, cooked shrimp, tails removed and chopped
1 cup frozen corn, thawed (I used canned corn, drained)
2 (4 oz.) can chopped green chiles, not drained
2 cups enchilada sauce (original recipe called for green sauce, I used red)
12 corn tortillas
1/2 can fat-free refried beans
1 cup reduced-fat monterey jack or mexican style cheese
1. Preheat oven to 425.
2. Grease a 9x13 pan. Spread 1/2 cup of enchilada sauce on the bottom of the greased pan.
3. In a medium, microwave safe bowl, combine the shrimp, corn, green chiles and 1/2 cup enchilada sauce. Mix together and heat in the microwave, covered, for 2 and a half minutes until warmed through.
4. Spread 1/2 a can of refried beans on 6 tortillas and layer them on the bottom of the greased, sauced pan. Spread the shrimp mixture on top of the refried beans. Cover with remaining 6 tortillas, and top with remaining cup of enchilada sauce.
5. Cover with foil and bake for 20 minutes, until sides bubble.
6. Remove from oven, sprinkle with cheese, and return to oven for 5 minutes or until cheese is melted.
![]() |
| It's never as pretty on the plate.... |
Sunday, July 8, 2012
Crockpot Honey Chicken
I know, it's been a while. It's the start of summer, which means we've been super busy with BBQs and camping and general summer life. Tomorrow, my summer vacation ends and summer school starts. As much as I love seeing my kiddos, I wish I could go back to having summers off like I did a few years ago.
With life going back to somewhat normal, it was time to get back in the kitchen and make a good home-cooked meal. Sundays are easily the best day for crockpot meals. I was able to sleep in, go grocery shopping and then throw the ingredients in and not have to worry about it for another 3-4 hours. Perfect.
This recipe, as the original recipe poster states, tastes just like the bourbon chicken you get in a mall food court. You know, the "sample sample" people that hand you chicken on a toothpick....yeah, that chicken. Next time I make this, I will use chicken breast, and pre-cut it into chunks before putting it in the crockpot. As flavorful as chicken thighs are, they just have too much fat and things that I prefer not to eat. I found myself "trimming" them and being left with half of what I started with. Then you're supposed to cut it into chunks after it cooks, but that was pretty difficult because it kept shredding. Also, use a decent amount of cornstarch to thicken the sauce. I used about 3 tablespoons and it didn't thicken up enough to my liking, I wanted a nice thick, sticky sauce to coat the chicken.
Crockpot Honey Chicken
from Table for Two
1 lb. boneless, skinless chicken thighs, about 5 ( I used a family pack)
Salt and pepper
1 cup of honey
1/2 cup of low sodium soy sauce
1/4 cup ketchup
2 tbsp. vegetable oil
2 cloves of garlic, minced
1/2 cup diced onion
1/4 tsp. red pepper flakes
Cornstarch
Instructions:
- Place the chicken thighs in the crockpot insert and sprinkle salt and pepper on both sides.
- In a medium sized bowl, combine honey, soy sauce, ketchup, oil, garlic, onion, and red pepper flakes. Stir to combine well. Pour over the chicken in the crockpot.
- Cook on low for 3-4 hours or high for 1 1/2-2 1/2 hours.
- When done, remove chicken from stock pot and cut into chunks. Prior to putting the chicken back in the stockpot, combine some cornstarch in water and whisk it into the crockpot to thicken up the sauce a bit. Throw the chicken back in and stir around to recoat the chicken in the sauce.
- Serve hot over a bed of white rice (optional) and sprinkle some sesame seeds on top.
Tuesday, June 19, 2012
Reeses Fluffernutter Cupcakes
Last night was our new team dinner for the 2012 Fall Cheerleading Season. Since I always feel compelled to contribute when a dinner is served, I decided to make some cupcakes. Specifically, I tried to make 2 kinds of cupcakes. Did you notice the word tried? Yeah, one batch ended up all over my kitchen. I managed to salvage enough batter, only to have it not bake correctly, and then only to realize that I have used that same chocolate cupcake recipe several times with the same results.
Anywho, back to the cupcakes that actually came out right.
Reeses Fluffernutter Cupcakes
from Bru Crew Life
Makes 24 cupcakes.
For the Peanut Butter Cupcakes
1 white cake mix
3/4 c. water
1/3 c. oil
4 eggs
1/3 c. creamy peanut butter
1/3 c. sour cream
24 reeses peanut butter cups
For the Marshmallow Butter Cream
1 c. butter
1 (7 oz.) jar marshmallow fluff
3 c. powdered sugar
1 tsp. vanilla
1/8 tsp. salt
For the Peanut Butter Cupcakes
For the Fluff Buttercream
Anywho, back to the cupcakes that actually came out right.
Reeses Fluffernutter Cupcakes
from Bru Crew Life
Makes 24 cupcakes.
For the Peanut Butter Cupcakes
1 white cake mix
3/4 c. water
1/3 c. oil
4 eggs
1/3 c. creamy peanut butter
1/3 c. sour cream
24 reeses peanut butter cups
For the Marshmallow Butter Cream
1 c. butter
1 (7 oz.) jar marshmallow fluff
3 c. powdered sugar
1 tsp. vanilla
1/8 tsp. salt
1. Preheat oven to 350.
2. In
a mixing bowl combine water, oil, and eggs. Add the dry cake mix and
beat for 1 minute on low. Add the peanut butter and sour cream and beat
on medium for 2 more minutes.
3. Place an unwrapped peanut butter cup
into the bottom of each cupcake liner.
4. Fill cupcake liners 3/4 full and
bake for 18 minutes.
5. Cool completely. Top with frosting and
sprinkles.
1. In
a mixing bowl beat the butter, fluff, vanilla, and salt until creamy.
2. Slowly add the powdered sugar until completely mixed in.
| Surprise! |
Monday, June 18, 2012
Georgetown Cupcakes
Let's start this by saying a big HAPPY BIRTHDAY to my friend Fiona! I dedicate this post to her and her birthday. Not only is it fitting that it's about cupcakes (a well-known birthday treat), but she's the reason this post was possible. Fiona invited me to Barrio, the pop-up dinner extravaganza craziness I went to a while back. Well, my knowledge of food, good company and good looks must have impressed her, because she invited me to another event with her.
The pre-opening event for Georgetown Cupcakes. They have been featured on TLC's "DC Cupcakes". Go to their website to read their history and latest and greatest locations, one being Newbury Street in Boston. Fiona and I had been talking cupcakes recently when the invite came out, so it was quite convenient that we got to attend this event. We set out for Newbury Street with an appetite for sugar.
We checked in and were face to face with this:
And this:
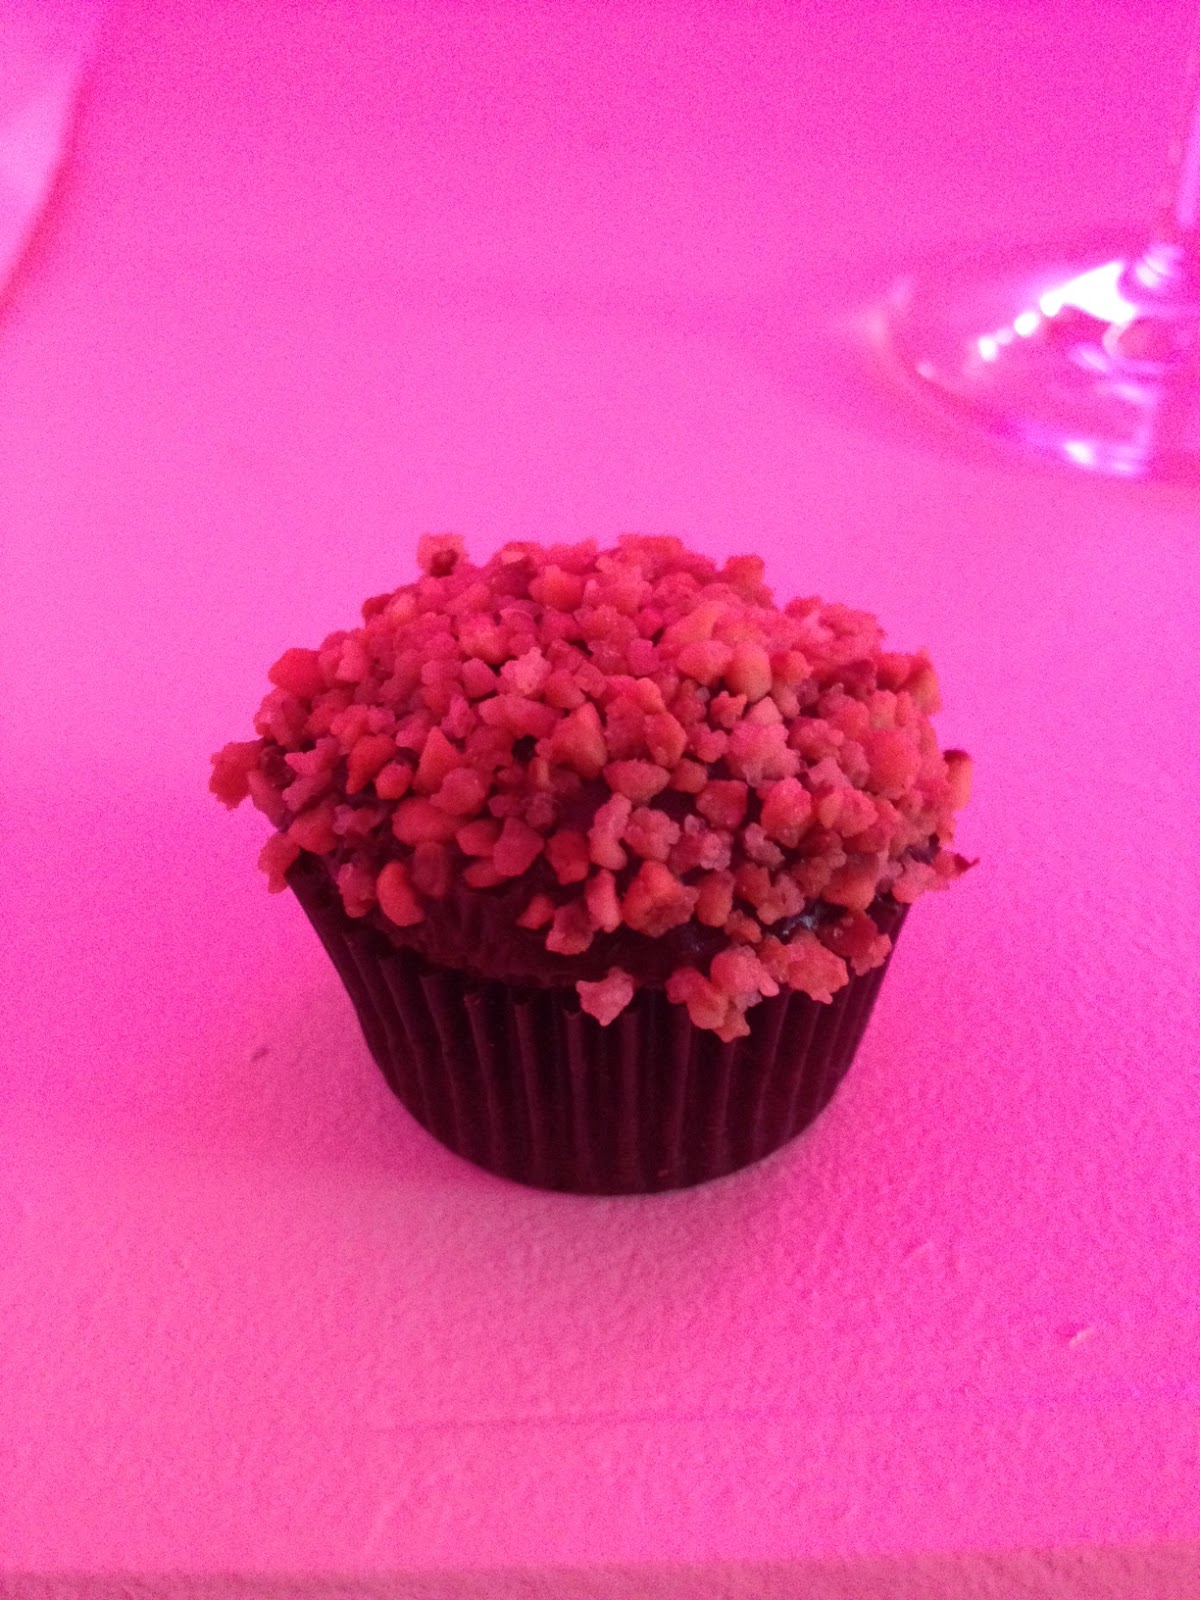
Now, Georgetown Cupcakes loves pink, as you can see from the boxes in the background and the flower ball arrangements in the background (they were everywhere). There was also some awkward pink lighting everywhere, which made picture-taking horrible. Hope you're ready for some of my worst pictures yet. And the worse thing is, I have a brand new Olympus E-PL1 camera, but did I bring it...no.
There was a waitstaff of men who were serving Moet & Chandon (and pink too!) and mini cupcakes. The cupcakes were....so-so. Each cake tasted the same, and the consistency of the cake was dry and grainy to say it best. It crumbled too much and made me want more champagne. The frosting was rich, but left me still feeling like everything was too dry. The chocolate frosting, however had more of a ganache consistency, which was nice. Here are some of the flavors we got:
This was hazelnut. It was too Nutella-tasting to me.
I'm not a fan of red velvet to begin with. I don't get the appeal other than the nice coloring.
Overall, I guess I felt that each cake was lacking something. I wasn't able to handle any more sugar than that. Not to mention they let in a bit too many people for the event, which left everyone cramped in a very hot and stuffy bake shop. The only saving grace was pink champagne and a hipster DJ who played Pitbull....and we all know how much I love me some Pitbull.
We finished out champagne and decided to cut out early to get some fresh air. We grabbed our goodie bags and set out for something non-sweet, which led us to the Parish Cafe.
A hat, coffee mug, t-shirt, book, gift card for a free dozen cupcakes and a travel coffee mug.
I consider myself quite the novice cupcake baker, but I think I'd take my cupcakes over theirs any day. I will have to cash in my gift card for my free dozen sometime and try more of their exotic flavors.
The pre-opening event for Georgetown Cupcakes. They have been featured on TLC's "DC Cupcakes". Go to their website to read their history and latest and greatest locations, one being Newbury Street in Boston. Fiona and I had been talking cupcakes recently when the invite came out, so it was quite convenient that we got to attend this event. We set out for Newbury Street with an appetite for sugar.
| Store Front |
| Oh yes. |
And this:
| I need this |
Now, Georgetown Cupcakes loves pink, as you can see from the boxes in the background and the flower ball arrangements in the background (they were everywhere). There was also some awkward pink lighting everywhere, which made picture-taking horrible. Hope you're ready for some of my worst pictures yet. And the worse thing is, I have a brand new Olympus E-PL1 camera, but did I bring it...no.
There was a waitstaff of men who were serving Moet & Chandon (and pink too!) and mini cupcakes. The cupcakes were....so-so. Each cake tasted the same, and the consistency of the cake was dry and grainy to say it best. It crumbled too much and made me want more champagne. The frosting was rich, but left me still feeling like everything was too dry. The chocolate frosting, however had more of a ganache consistency, which was nice. Here are some of the flavors we got:
| Ugh pink lighting... |
| Salted Caramel...but with no salt |
| Boston Cream....with no cream filling |
| Chocolate Coconut |
| Red Velvet |
Overall, I guess I felt that each cake was lacking something. I wasn't able to handle any more sugar than that. Not to mention they let in a bit too many people for the event, which left everyone cramped in a very hot and stuffy bake shop. The only saving grace was pink champagne and a hipster DJ who played Pitbull....and we all know how much I love me some Pitbull.
We finished out champagne and decided to cut out early to get some fresh air. We grabbed our goodie bags and set out for something non-sweet, which led us to the Parish Cafe.
| The Loot |
A hat, coffee mug, t-shirt, book, gift card for a free dozen cupcakes and a travel coffee mug.
I consider myself quite the novice cupcake baker, but I think I'd take my cupcakes over theirs any day. I will have to cash in my gift card for my free dozen sometime and try more of their exotic flavors.
Subscribe to:
Posts (Atom)