It was a busy end to last week, and my days are only getting busier. I missed Zucchini Day, which has its pros and cons. The pros are that I had 7 recipes to choose from and just couldn't decide. The cons are that I didn't make anything with zucchini....and my plan of cooking for special days was lost to yet another ingredient. Oh well.
Mum took me out for dinner last night, so I agreed, in return, that I would cook dinner tonight. Lately, I haven't been in the mood for anything. Every recipe I read just seems 'eh' to me. I think it's the heat and the million other things on my mind getting in the way. I needed a recipe that both my parents would eat. Dad is pretty finicky, anything with goat cheese or an ingredient he's never heard of and he won't touch it. Mum's a little better, but she has definitely given me some looks when I tell her things I'm planning on cooking. This was a simple and quick recipe that turned out really good. Kid cooked - parent approved.
I should stop referring to myself as a kid.
Sweet and Sour Pork
from Cooking Light Magazine
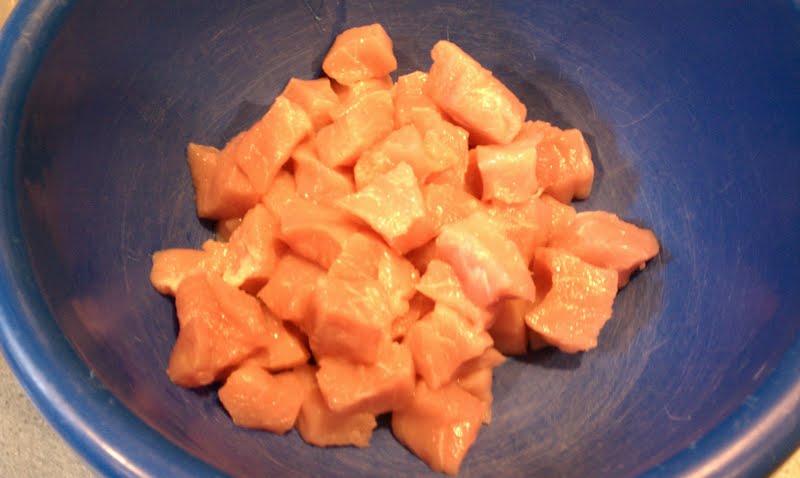
1 lb. pork tenderloin, cut into 1/2 inch pieces
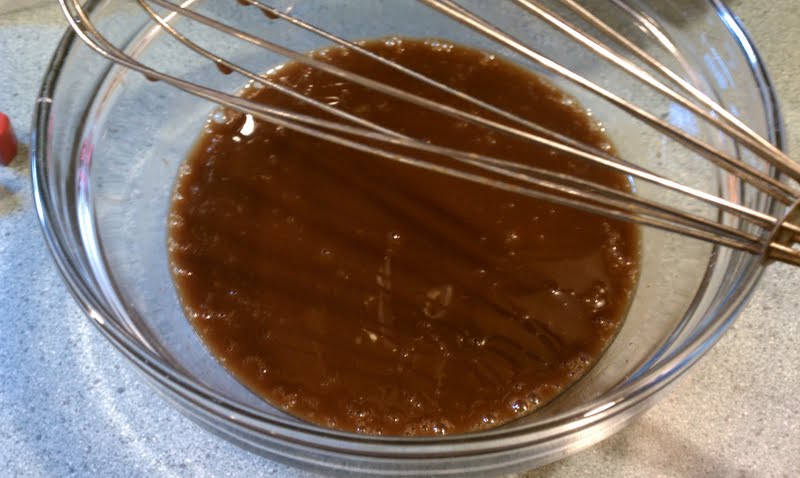
2.5 tbsp balsamic vinegar, divided
kosher salt
2 tsp low-sodium soy sauce
1 tbsp cornstarch
3 tbsp ketchup
3 tbsp sugar, plus a pinch
3 tbsp peanut or vegetable oil (I used peanut)
3 cloves garlic, minced (I crushed mine)
2 carrots, thinly sliced
3 scallions, cut into 1/2 inch pieces
3 cups snow peas, cut in half
1. Toss the pork with 1/2 a tablespoon of balsamic vinegar and a pinch of salt in a bowl. Mix the remaining 2 tbsp of vinegar, soy sauce, cornstarch, ketchup, 3 tbsp sugar, 1/3 cup water, and 1/2 tsp salt in another bowl.
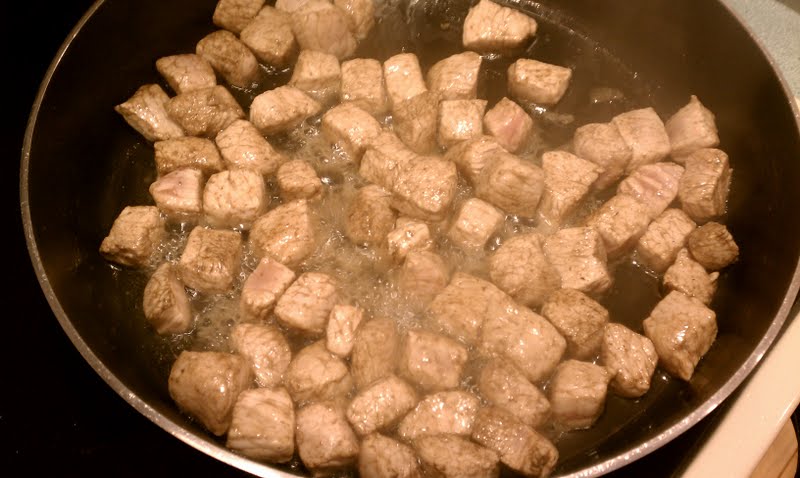
2. Heat 2 tbsp oil in a large skillet or wok over high heat. Add the pork and slowly stir until it is mostly opaque, about 2 minutes (be careful, the oil will splatter!). Remove the pork with a slotted spoon and transfer to a plate. Discard the oil and wipe down the skillet.
3. Heat the remaining tbsp of oil in the skillet, turn down the heat to med-high. Stir fry the garlic along with a pinch each of sugar and salt, 15 seconds. Add the carrots and scallions and stir-fry until crisp-tender, 2 minutes. (Add a little water if the garlic starts to stick to the pan.) Add the pork, snow peas, and soy sauce mixture; stir until the pork is cooked through and the sauce is thickened, about 3 minutes. Serve over rice.
I cooked mine on a lower heat for longer, as my skillet was pretty hot.
 |
| Pork! |
 |
| Sauce! |
 |
| Oh man, pork and balsamic vinegar.... |
 |
| Veggies! |
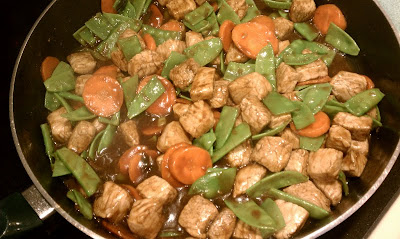 |
| Almost ready! |
 |
| I would have the lowest plating points score ever on Iron Chef America.... |