Tuesday, May 24, 2011

Rasberry Cheesecake Brownies

I had a compulsion to bake tonight, and I couldn't decide between something fruity or chocolaty...so both it was. I am updating this super quick before I head off to dance class.

Raspberry Cheesecake Brownies
from Please Pass the Pie

For the filling:
8 oz. cream cheese, softened
1/4 c. sugar
1 large egg yolk
3/4 t. vanilla extract

For the brownies:
2/3 c. flour
1/2 t. baking powder
1/2 t. salt
8 T unsalted butter, cut into pieces
4 oz. unsweetened chocolate, chopped
1/2 c. raspberry jam
1 1/4 c. sugar
3 large eggs
1 1/2 t. vanilla extract

1. Heat the oven to 350 degrees. Grease an 8-inch pan. Blend all of the filling ingredients together in a food processor.

2. For the brownies, combine the flour, baking powder and salt. Microwave the butter and chocolate together in short intervals, stirring frequently, until melted. Whisk in 1/4 c. of the jam and let cool slightly. Add the sugar, eggs and vanilla to the chocolate mixture. Whisk in the flour mixture until no white streaks are left.

3. Microwave the remaining jam until just warm; stir until smooth. Scrape half of the brownie batter into the pan. Dollop the cheese filling over the batter and spread evenly. Dollop the jam on the cheese mixture and use the tip of a knife to swirl. Spread the remainder of the brownie batter over the top.

4. Bake until a toothpick inserted in the center comes out with a few dry crumbs -- about 50 to 60 minutes. Let cool, then cut. Refrigerate.


yup.

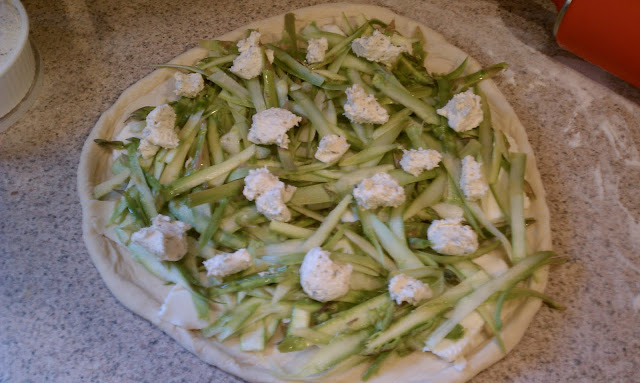
Shaved Asparagus Pizza

I am not good with pizza...or rather pizza dough. I was going to make my own dough, and I'm somewhat glad I didn't. I bought the pre-made dough from the pizza counter at Shaw's. Maybe I didn't let it sit long enough, but manipulating dough is a tough and highly annoying job.

May is asparagus month, and I love asparagus, so I rummaged through some recipes on my To Make list and came up with this one. In the future, I may pre-bake the pizza crust for a few minutes so the top gets a chance to cook more. I had to put this into the oven a few times to get it thoroughly cooked through, and I had to put it back in once more after cutting it, which bothers me.

Shaving (or peeling) asparagus is an awkward task until you get into a groove of doing it. My first few stalks kept breaking. I finally laid them down on the cutting board and peeled them, that seemed to work for me. This was also the first time I got to use my Pampered Chef pizza stone that my Gram bought me for Christmas. I got this recipe from my most-used source fore recipe's, Annie's Eats. Don't click the link to her blog under my recipe title....she's an amazing cook (and doctor....and mother of 2...) and her pizza came out much prettier than mine.

Oh. and before we jump into the recipe, let me just say that transferring the pizza from the counter to the preheated stone was.....interesting. Now, maybe it's my novice chef skills and experience....but it was not easy. At one point I squished my pizza, and then I had to finagled a floured thin cutting mat under most of it and tried to slide it onto that and then onto the stone. That seemed to work. I need one of those giant pizza spatulas.

Shaved Asparagus Pizza
from Annie's Eats

Pizza dough (homemade or store bought)
olive oil for brushing
4 oz. fresh mozzarella cheese, thinly sliced
8 oz. asparagus
3 oz. spreadable garlic and herb cheese, such as Boursin (I used Alouette)
Kosher salt
Pepper


1. Preheat the oven and a pizza stone at 500˚ F for at least 30 minutes.  Roll out the pizza dough into a 12-14 inch round.  Lightly brush the surface of the dough with olive oil.

2. Cut the tough woody stems off the ends of the asparagus spears.  Use a vegetable peeler to shave the spears into ribbons. It will look like an awful lot of asparagus, but it will cook down in the oven, so you should use more than you think you should.

3. Place the sliced mozzarella over the pizza dough in an even layer.  Pile the asparagus shavings over the top of the mozzarella.  Dot the surface of the pizza with the garlic herb cheese.  Season with kosher salt and pepper. (I skipped the salt and pepper)

4. Transfer the pizza to the preheated pizza stone and bake until the cheese is melted and bubbling and the crust is lightly browned, about 12 minutes.  Remove from the oven and let cool slightly before slicing and serving.

Not quite circular pizza

Lots of asparagus

And the garlic and herb cheese......mmm....

You can see all the melted and toasted cheesy goodness...


Sunday, May 22, 2011

Spinach and Egg Noodle Casserole

Today was the day of my Pampered Chef party!!! My wish list was almost an entire page long...I have to nail down a few items that I definitely want by the close of my party on Thursday. New steak knives sound great...

Today was also Vanilla Pudding Day, and I was going to make a trifle, but I decided against it. I made these mini casseroles instead, and I'm glad I did. They were a big hit.

This is a recipe from Rachel Ray's magazine. It says that the recipe can be made into one big casserole or 12 mini casseroles......lies! All lies! I made 12 mini casseroles AND a large casserole with the one recipe.

Spinach and Egg Noodle Casserole
from Everyday with Rachel ray

2 (10 oz) packages of frozen chopped spinach
1 lb. extra-wide egg noodles
1 tbsp. EVOO
1 medium onion, diced
2 cloves garlic, minced
3 tbsp butter
2 rounded tablespoons of flour
2 cups whole milk
freshly grated nutmeg (i used ground nutmeg)
2 egg yolks
1 cup panko or whole wheat panko breadcrumbs
1 cup shredded Gruyere
1/2 cup shredded parmagiano-reggiano cheese

1. In a microwave, defrost the spinach, then wring dry in a clean kitchen towel. Bring a large pot of water to a boil, salt it, and cook the pasta until al dente. Drain and return pasta to the pan.

2. While the pasta is cooking, add EVOO to a skillet over medium heat. Add the onion and garlic and cook until tender, 8 to 10 minutes. Add the spinach, breaking it apart, to heat through. Season with salt and pepper. Remove the pan from the heat.

3. Position an oven rack in the center of the oven and preheat the broiler. While the onion cooks, in a medium saucepan, melt the butter over medium heat. Whisk in the flour for one minute, then whisk in the milk; season with salt, pepper and nutmeg. Cook until thickened, about 5 minutes.

4. In a bowl, whisk a little of the sauce with the egg yolks; then whisk the yolk mixture into the sauce in the pan and turn the heat to the lowest setting. In a bowl, combine the panko and cheeses.

5. Stir the spinach and sauce into the pasta and combine. Transfer to a casserole dish or into 12 greased muffin tins. Top with the panko-cheese mixture. Broil in the oven until bubbly and brown, 3-5 minutes.

I used about a cup and a half of Gruyere cheese, because I had it on hand (already shredded!) and 1/4 cup of shredded parmesan. 

Mini casserole for the party

Learn how to measure, Rachel Ray!

Thursday, May 19, 2011

Garlic Basil Pesto Patsa

I usually don't cook on Thursdays, but tonight is not one of my trivia nights. I also completely forgot about a work/dinner party I had, and I was dead set on making this dish. Ever since I saw the photo of it on Tastespotting.com I've been thinking about it. Pesto is not my favorite, unless it's roasted red pepper pesto, which I've made before, and that is divine. Regular basil pesto is great, but it's not an option I'd go with often.

I also poached my very first egg today. Poaching eggs have always scared me. The directions had exact temperatures to follow, all sorts of fancy methods, like pouring the egg into a cup and then into the water, etc. I totally winged it because I was rushing, but my "method" worked. I almost boiled some water in a medium saucepan and poured my egg from a cup into the water gently. I used a spoon to move the whites toward the yolk and let it cook for 3 minutes. Then I removed it with a slotted spoon. I'm awesome.

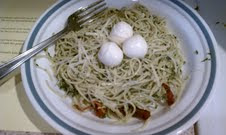
Garlic Basil Pesto Pasta
from Wee Foodie Fashionista

6 oz dry pasta, I had angel hair on hand
1/2 cup fresh mozzarella balls
1 large bunch of fresh basil, stem and all
1 bulb of garlic peeled
1/2 cup shredded parmesan
1 lemon, juiced
1/2 cup olive oil
1/2 tsp kosher salt
1/2 tsp black pepper
poached eggs (optional)

1.Prepare pasta according to package directions.
2. While pasta is cooking, combine basil, parmesan, lemon, garlic, olive oil, salt and pepper into a food processor. Pulse until mixed well. If you need to add more olive oil do so. The mixture might be a little thick, do not worry.
3. Toss pesto with cooked pasta in a skillet over medium heat.
4. Serve immediately, topped with mozzarella balls and poached eggs.

**I highly....highly....did I say highly?.....recommend eating this with the poached egg. The creaminess of the egg yolk makes the dish sooooo much better. I also threw in some sun dried tomatoes I had in the fridge.

Super terrible quality photos ahead.....

Pesto in the processor

Pesto and mozzarella balls

Awesome egg skills....terrible photo skills


Tuesday, May 17, 2011

Cherry Cobbler

Happy Cherry Cobbler Day!

I've never made, nor had, cheery cobbler, so when I looked up a recipe I went with as basic as possible. I'm glad I did, because today provided me with a very tight schedule....as in, for dinner I ate a turkey and cheese sandwich. I also had this fantastic brussel sprout salad planned, but what do you know? Shaws had no brussel sprouts in the store. I love brussel sprouts, but have never bought them. I have literally stood in front of them in the store dozens of times debating whether or not to buy them, and now that I needed them...nowhere to be found. Grrrrrr.....

This recipe was also easy on the wallet, as it's ingredients were mostly baking items I have on hand at all times...flour, sugar, baking powder, butter, milk. I only had to pick up some cherry pie filling.

Cherry Cobbler
from Cooks.com

1/2 stick butter
1 cup flour
1 cup white sugar
2 tbsp. baking powder
3/4 cup milk
1 tsp. salt
1 can of cherry pie filling

1. Preheat oven to 350.
2. Melt butter in a 9 x 13 x 2 pan. (I used an 8 x 8 pan).
3. Mix flour, sugar, baking powder and milk together. It should be thin. Pour over melted butter.
4. Spoon cherry pie filling over the top (do not mix!).
5. Bake for 50-60 minutes until golden brown and cooked through. (Cook fora bout 45 minutes if using a smaller pan like I did).

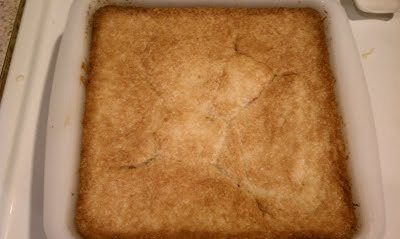
Beware of hidden cherries.


This was delicious. I was very wary about how I used a smaller pan but the same amount of batter. it puffed up a whole bunch (as you can see in the photo) and covered the cherries, but I liked it that way.

Tuesday, May 10, 2011

Proscuitto Wrapped Shrimp

Happy Shrimp Day!

I had these great shrimp rolls planned, and earlier today I was just feeling sorta "blah" and wasn't looking forward to coming home to make a very time consuming dinner. I decided that a shrimp side would be better, which I
paired with....Shake & Bake Chicken and Rice a Roni.

I know what you're all thinking...

"But Sarah, you cook up all these difficult things and you settled with Shake & Bake?!"

Yes, I did.

I also realized why they call is Rice a Roni...because it has orzo pasta in it. I never realized that...though I've also never made it, but I've eaten it plenty of times. I realized it when the directions said to pour the rice pasta mix into the pan...and I went "pasta?!" Then it hit me..

rice a roni...... mac a roni

Clever marketing.

Before I get to the recipe (which is ridiculously easy), let me share some other shrimp dishes I've made in the past in honor of Shrimp Day.

Chorizo, Shrimp, and Corn Stuffed Peppers

Shrimp and Mango Curry

Sweet & Hot Shrimp Tacos

Shrimp Polenta Pizzas

Shrimp and Corn Chowder

  
Szechuan Shrimp


Shrimp with Parmesan Cream Sauce

Prosciutto Wrapped Shrimp
from somewhere on the net

20 jumbo shrimp, cooked, tails removed
1 pkg thinly sliced prosciutto, cut into enough strips to cover shrimp
6-8 tbsp. butter, softened
1 tbsp. jarred minced garlic
2 tbsp. garlic powder (I used Tastefully Simples Garlic Garlic Seasoning)

1. Mix the butter, minced garlic and garlic seasoning together until well blended.
2. Lay out a strip of prosciutto. Cover both sides of shrimp with garlic butter.Roll up the shrimp in the prosciutto.
3. Repeat until all shrimp wrapped.
4. Spray a large skillet with cooking spray and fry shrimp over med-high heat until prosciutto has slightly crispy and shrimp are heated through.

I know it doesn't look appetizing, but it is!

Monday, May 9, 2011

Cheddary Chicken Pie

Today has been a day where I've felt I was on top of things, but then would forget something and have to go back and do it. Cooking was no different.

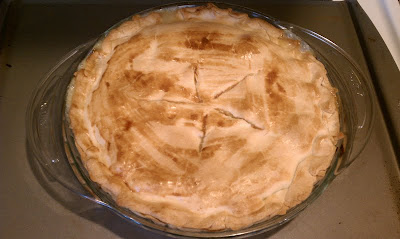
I read the recipe quickly and it seemed simple enough. I did great until the end, after I assembled my whole chicken pie (I learned I am terrible at sealing pie edges...must practice...) and I forgot to preheat the oven. Then as my oven beeped to tell me that it was finally preheated, I realized I forgot to brush the crust with egg. I just wanted a quick process due to the fact that I don't normally cook on Mondays. I had a meeting after work, then took the dog out, and then I usually relax before dance class. I am finally semi-relaxing....still awaiting the pie to finish baking.

Today is Butterscotch Brownie Day...but no recipe for that. Sorry folks. The blog I got this recipe from is one I frequent and have cooked many dishes from. I followed the recipe pretty closely. It called for either frozen veggies or fresh chopped veggies and I almost went with fresh, but I'm glad I grabbed frozen veggies at the store yesterday since this task got put off until today (this was originally yesterday's recipe). My only issue is, a mixed bag of veggies has peas, corn, carrots, green beans and lima beans. I've never had green beans or lima beans in chicken pot pie before (or cheese, but what isn't good with some added cheese??), so this should be interesting. I'm a big fan of my pot pie having chicken, peas and carrots....maybe onions, but usually pretty basic.

Cheddary Chicken Pie
from Pennies on a Platter

2 ready made (or homemade!) pie crusts for a 9" pie plate
2 cups shredded or chopped cooked chicken
1 (10 oz) bag of mixed frozen veggies, thawed
2 tbsp. butter
2 tbsp. flour
1 1/3 cups whole milk
chopped fresh parsley
1 cup shredded cheddar cheese
1 egg, beaten well

1. Preheat oven to 425. Spray pie plate with cooking spray.
2. Melt butter in a saucepan. Add flour and mix for 1 minute, stirring continuously.. Add milk and mix, stir frequently and bring to a simmer.
3. Add veggies and stir. Cook for 3-4 minutes until veggies are heated through.
4. Remove pan from heat and add chicken, cheese and parsley. Mix together.
5. Place one pie crust into the greased pie plate. Spoon filling mix into the crust. Cover with the other crust and seal the edges (do it better than I did!). Be sure to cut slits in the crust so steam can escape unless you are doing a fancy lattice design (I wish I had).
6. Brush crust with beaten egg. Cover crust edges with pieces of foil.
7. Bake for 20 minutes. Remove foil and bake for an additional 15-20 minutes or until crust is a deep golden brown.

Chicken cooked and ready to go

Simmering veggies

Check out the edges of that bottom crust.....ugh...

If it wasn't bubbling I would punch my hand into and hand feed myself...I would.

Sunday, May 8, 2011

White Chocolate Coconut Cream Pie

It's Coconut Cream Pie Day! It's also Mother's Day. My mother asked for some hanging plants to put up on the porch, so we are going to pick some out soon. I also bought her some flowers. My dog got me some flowers also...she's such a good daughter!

Tess will find water, even dirty water, to frolic in...

Flowers!

I started my day with some Bloody Mary's with the ladies, then had a cookout at my grandmother's. The day didn't stay too warm, so we moved inside for some tea. Pretty good day if you ask me. And in the middle of all of this, I made a pie.

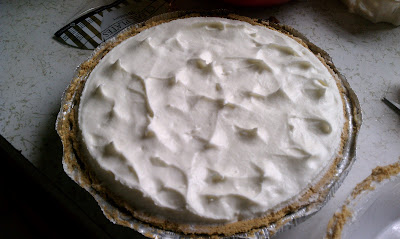
My plan was to make the crust and all, but morning drinks lasted longer than expected, so I bought a premade crust. I also changed the recipe a bit. As much as I do love coconut, this recipe called for coconut mixed into the crust and into the cream filling. I just topped my filling with coconut before putting the whipped cream on top. I got some mixed reviews. My cousin, who doesn't like coconut, did not like the pie (I discount her judgment). My aunt also tried it and she is not a big "texture person" as I call them, and between the pudding, the shredded coconut and the whipped cream it was a bit much. My Gram and I enjoyed it, though it is very sweet due to the white chocolate.


White Chocolate Cream Pie
from here

1 ready made graham cracker pie crust
1 pkg. Jell-O instant coconut cream pie pudding
1 3/4 cup cold milk
1 pkg. Bakers White Chocolate (6 squares)
1 1/2 cups heavy cream, divided
1/2 cup shredded coconut

1. Melt 3 squares of white chocolate in the microwave, stirring every 30 seconds until completely melted.
2. Pour the chocolate over the bottom of the crust. Refrigerate until solid.
3. Whisk the pudding and milk together for 2 minutes. Pour over the crust and chocolate. Refrigerate until chilled and set.
4. Melt the remaining squares of chocolate and 1/4 cup of cream in a large microwave safe bowl. Stir every 30 seconds until fully melted and mix to combine fully. Let the mix cool until it reaches room temperature.
5. Sprinkle the shredded coconut over the set pudding.
6. Using an electric stand mixer with a chilled bowl, whisk the remaining cream until soft peaks form. Pour in the white chocolate mixture and whisk until thicker peaks form. Spread over the pie and refrigerate to chill.
7. Serve!

Lighting isn't great in Gram's kitchen

Mmmmmm

Thursday, May 5, 2011

Cinco de Mayo!

Happy Cinco de Mayo!

Whenever I get to cook in the classroom I get really excited...especially when my girls compliment me on my "impressive skills" pertaining to me chopping up veggies. My girls in the class are pretty finicky eaters, so the eating part went mostly to the teachers, but we still had fun. Here's what we made:

Mexican Casserole

We couldn't wait to dig in...
Apple Pie Enchiladas
Totally Awesome
Sombrero Cookies
Ole! 
Sombrero cookies are absurdly easy if you use break and bake sugar cookies. All you need are some baked sugar cookies, icing tubes and gumdrops. Place some icing in the middle of a cookie and stick a gumdrop on top. Then decorate around it. These were my cookies, the girls ate theirs right after they finished decorating them.

Now I'm off for my favorite Cinco de Mayo treat....mango margaritas and cervezas!

Wednesday, May 4, 2011

Orange Juice Day

When I started planning for this "Special Food Each Day" quest, I thought I was pretty savvy and had new recipes for each day I was going to cook. I thought to myself "ooh, Wednesday is orange juice day. What's my favorite thing with orange juice? It's Asparagus Stir-Fry." Then I went and cooked it, and it was delicious, and on my next to last bite I realized....

...this recipe is already in my blog.

How boring is that, that I have no new recipe for you?

Ugh, so I am frustratingly posting the link to this great, but already-known dish...

Tuesday, May 3, 2011

Raspberry Tarts

Today is Raspberry Tart Day! My grandmother and mother have been making tarts for years, and I believe it was about time that the recipe came down to a new generation. I can't believe I haven't made these yet, as it's a family favorite and SO EASY to make. I made these in a flash before an alumni meeting I had tonight. My grandmother's comment was "it's about time you've graduated up" or something similar...she was basically saying that since I used her recipe I am now a master chef. I'm fine with her thinking that.

Raspberry Tarts
from the family

2 refrigerated pie crusts
seedless (or seeded) raspberry preserves
3 tablespoons sugar
1/2 stick of butter, softened
2 eggs
1/2 tsp baking powder
1 pkg. shredded coconut

**I recommend using a tart baking pan for the perfect shape. A pan usually makes 9 tarts, I filled 2 pans**

1. Preheat oven to 400. Spray or grease your tart pans.
2. Roll out the dough onto a flat surface. Using the rim of a glass (or any other small circular cutter) cut out 18 rounds. Place them into the tart pan.
3. Place a teaspoon of preserves onto the dough rounds.
4. Combine sugar and butter and mix until smooth. (My butter was more "melty" than soft and that worked fine). Add the eggs, baking powder and coconut and mix until combined. You want a nice thick coconut mixture.
5. Place a tablespoon of the coconut mix on top of the preserves.
6. Bake for 20 minutes. (Be sure to check on these as the preserves often times boil over the pans, and the coconut can burn).


Don't put too much preserves, they boil over quickly!


Oh yes.

Chorizo, Shrimp & Corn Stuffed Peppers

I really don't like getting my hopes up for a recipe that sounds absolutely perfect the way it is...only to struggle to find the ingredients you need. Shaws is hit or miss with produce, and this time around, they had no poblano peppers which was what this recipe called for, and part of what drew me in. The other part that drew me in was the chorizo...it was about time that I tried it. I'm glad I did...and I bought too much, so now I have to figure out what I'm going to do to use up the rest. I'm happy with how this turned out despite not having the poblanos. I'm posting the original recipe, since I think that it would be better with the poblanos, but using regular old green bell peppers (or any color bell pepper) works just fine. I also left out the tomatoes since this was a family dinner and Dad and I don't like them.


Chorizo, Shrimp and Corn Stuffed Peppers
from here

  • 1 tbsp olive oil
  • 1/2 lb Mexican-style chorizo
  • 1yellow onion (diced)
  • 1 jalapeno (minced)
  • 2 tablespoons garlic (minced)
  • 1 cup short-grain rice
  • 1 cup frozen corn
  • 1 cup low-sodium chicken stock
  • 1/2 cup white wine
  • 1/2 cup water
  • 4 large poblano chiles
  • 1 pound shrimp, shelled (chopped)
  • 6 roma tomatoes (diced)
  • 3/4 cup shredded cheddar cheese
  • 3/4 cup shredded pepper-jack cheese
  1. Preheat the oven to 400F and heat the oil in a large skillet.
  2. In the skillet, sauté the chorizo, onion, jalepeno and garlic over medium heat until chorizo is cooked (about 5-10 minutes).
  3. Add the rice, corn, stock, wine and water and bring to a boil, then reduce the heat, cover and let simmer until the liquid is absorbed and the rice is cooked (about 25-30 minutes).
  4. While the rice is cooking, place the chiles on a baking sheet and bake at 400F until soft (about 15 minutes).
  5. Once the chiles are soft, cut each in half, remove the seeds and ribs, and set aside.
  6. Once the rice is done, add the shrimp and tomatoes to the mixture, turn the heat to medium and sauté until shrimp is cooked (about 3-5 minutes).
  7. Stuff each chile with the rice mixture, top with cheddar and pepper-jack cheese, and place back into the oven and turn on the broiler.
  8. Broil until cheese begins to turn golden (about 3-5 minutes).
Ready for roasting and stuffing
Chorizo, onions, jalapeno and garlic
Add in some stock, wine and frozen corn
Looking good!

Sunday, May 1, 2011

Chocolate Mint Parfaits

Today is Chocolate Parfait Day. I browsed through some parfait recipes and many of the chocolate ones were more chocolate and peanut butter parfaits, with a big emphasis on the peanut butter. So, after quite a search, I decided that parfaits are a no-brainer dessert and I could do without a recipe. I was correct and it was delicious. The following recipe is what I wanted to use to make these. Unfortunately, I could find any of the chocolate mousse mixes I used to buy all the time, and I didn't have time to make a mousse, so I used Jello Mousse temptation cups.

Chocolate Mint Parfaits
Makes 4

32 Thin Mint Cookies, crushed
1 pkg. instant chocolate pudding, prepared according to package directions
1 pkg. chocolate mousse mix, prepared according to package directions
Whipped cream

1. Crush the thin mint cookies to pieces however small you want them.
2. Sprinkle a layer of cookies into the bottom of a small serving dish (about 4 cookies). Spoon a layer of chocolate pudding on top. Sprinkle another layer of cookies on top of pudding (about 4 cookies). Spoon a layer of mousse on top. Top with whipped topping and a piece of a cookie if desired.

Cookies 
Pudding 
Mousse
Parfait!

You are now free to make them and quote donkey from Shrek as he talks about parfaits.  

"I ain't never met someone who didn't like parfait. You never hear someone say, "Hey, you want some parfait?" "Hell no, I don't want no parfait!"

Linguine with Tomato Clam Sauce

My cooking motivation has returned. I have two posts for tonight's meal, the main course and the dessert.

Today is Chocolate Parfait Day. How do I know this? WELL, in my classroom we do an activity every day where every day is a special day...it's someone famous' birthday, something was invented, it's a special food day, etc...

I got to thinking that I bet there's list of special food days somewhere...and that somewhere is the internet. I googled "special food days" and was guided to www.thenibble.com, where you can go month by month and see what food is represented each day. There are some repeats, which I tried to avoid, but I have a list of special food days for every day of the year. Yup, every day of the year. Today, May 1st, is Chocolate Parfait Day. That recipe will be in the next post.

So what are the special food days of May, you ask?!

May 1 - Chocolate Parfait Day
May 2 - Truffles Day
May 3 - Raspberry Tart Day
May 4 - Orange Juice Day
May 5 - Cinco de Mayo (wayyy too many foods could fall under this)
May 6 - Crepes Suzette Day
May 7 - Roast Leg of Lamb Day
May 8 - Coconut Cream Pie Day
May 9 - Butterscotch Brownie Day
May 10 - Shrimp Day
May 11 - Eat What You Want Day
May 12 - Nutty Fudge Day
May 13 - Apple Pie Day
May 14 - Buttermilk Biscuit Day
May 15 - BBQ Day
May 16 - Coquilles St. Jacques Day
May 17 - Cherry Cobbler Day
May 18 - Cheese Souffle day
May 19 - Devil's Food Cake Day
May 20 - Quiche Lorraine Day
May 21 - Strawberries and Cream Day
May 22 - Vanilla Pudding Day
May 23 - Taffy Day
May 24 - Escargot Day
May 25 - Wine Day
May 26 - Blueberry Cheesecake Day
May 27 - Grape Popsicle Day
May 28 - Brisket Day
May 29 - Coq Au Vin Day
May 30 - Mint Julep Day
May 31 - Macaroon Day

I mainly cook on Sundays, Tuesdays and Wednesdays, as Mondays I have 2 hours of dance and Thursday - Saturday I'm out and about at night. I am going to try to make as many things as I can on the list that fits into my schedule. So, I had the parfait planned, I just needed my actual meal. That is where the linguine comes in.

Linguine with Tomato Clam Sauce
from "The Illustrated Kitchen Bible"


2 tbsp. olive oil
1 onion, finely chopped
2 garlic cloves, finely chopped
1 (28 oz) can chopped tomatoes (I used crushed)
2 (6oz) cans of clams in natural juice, drained and juice reserved
1/2 cup dry white wine
2 tbsp. tomato paste
salt and pepper
1 lb. dried linguine
parsley to garnish

1. Heat the oil in a large saucepan over medium heat. Add the onion and cook, stirring frequently, for 5 minutes, or until softened. Add the garlic and stir until fragrant, about 1 minute. Add the tomatoes with their juices, clam juices, wine and tomato paste. Season with salt and pepper. Bring to a boil. Reduce to low heat, partially cover and simmer for 10-15 minutes, until the sauce thickens, stirring occasionally.

2. Meanwhile, bring a large pot of salted water to a boil. Stir in the linguine, and cook according to the package directions or until al dente. Drain the pasta, and shake to remove any excess water.
3. When the pasta is almost done, add the clams to the sauce and continue to simmer for 1-2 minutes, until heated through. Add salt and pepper to taste.
4. Add the linguine to the sauce and toss to coat and make sure that the clams are evenly distributed throughout the pasta. Sprinkle with pasta and serve.

Shrimp with Parmesan Cream

Once again, this is a post with no pictures. I made this over a week ago when my email was down (it's back up though, so tonight's dinner will be a photoshoot), so I didn't even bother to take any photos. This is the first thing I made from my newest cookbook "The Illustrated Kitchen Bible". I chose to make this first because I finally found some creme fraiche in my grocery store and had it in my fridge. This was super simple to make, and it was even quicker due to my store selling pre-diced pancetta (actually, that's the only pancetta they have).

Shrimp with Parmesan Cream
from "The Illustrated Kitchen Bible"

2 tbsp. olive oil
4 oz. pancetta or slab bacon, diced
4 scallions, green and white parts, sliced
2 garlic cloves, minced
24 large shrimp, peeled and deveined
1/4 cup creme fraiche (or heavy cream if you can't find creme fraiche)
2 tbsp. fresh lemon juice
salt and pepper
3 tbsp. shredded parmesan cheese

1. Heat olive oil in a large frying pan over medium heat. Add the pancetta and cook for 5 minutes until beginning to brown. Add the scallions and garlic, and cook 3 minutes more, or until the scallions are just beginning to soften.
2. Add the shrimp and cook, stirring occasionally, for about 3 minutes, until they are almost completely opaque. Add the creme fraiche and bring just to a simmer. Stir in the lemon juice and season to taste with salt and pepper. Lower the heat and simmer until the shrimp are opaque throughout, about 1 minute.
3. Transfer to a serving dish. Sprinkle with parmesan cheese. Serve hot.

Pork, Beef and Bison Chili

I just typed up this entire post, only to hit a wrong key and have it completely disappear.

Awesome.


It was full of some great little tidbits of info and wit, but now I'm frustrated and have no wit left to give. This recipe from the chili cookoff last weekend, which I didn't win, but this chili is great nonetheless. I added more meat than the original recipe due to needing to feed many people, and I added more tomato sauce and some smoky chipotle seasoning. I also only used half of the beans called for. The great thing about chili is that you can make it to your liking by adding or reducing ingredients. If you don't need to make a very full crockpot of chili, then reduce the meat to 1/2 pound of each and reduce the tomato sauce. Depending on your liking, you can also reduce the amount of diced tomatos and beans.

Pork, Beef & Bison Chili
from here

1 pound ground bison (or lean ground beef if you can’t get bison)
1 pound ground pork
1 pound ground beef
1 large onion, chopped
2 cloves of garlic, minced
3 (14.5 oz) cans diced tomatoes with roasted garlic 
2 (15 oz) cans tomato sauce
3 tablespoons chili powder
1 teaspoon fresh ground black pepper
1 teaspoon cumin
1 teaspoon salt
Cayenne pepper or red pepper flakes, to taste
2 (15 oz) cans pinto beans

1. In a large skillet, cook the meat, onions, and garlic until the meat is brown and the onions are tender.

2. Place meat mixture (without draining) and all other ingredients except beans into a large crockpot. Cook on high for at least 5-6 hours, or low for 10-12 hours, stirring caramelized sauce back into the chili.

3. As the chili is nearing completion, it should be easy to skim off any fat with a tablespoon as it will pool on top of the chili as it simmers. Approximately one hour before the chili is finished, drain and rinse the beans, and add to the crock pot.