Thursday, November 28, 2013

Banana Caramel Cupcakes

Happy Thanksgiving!

There's something about the holidays that just wipes me out. And no, it's not the tryptophan. Dan and I are fortunate that we can spend the holidays with both of our families, since we all live about 10-15 minutes apart. But, that's double the food and double the energy, which makes for a long day.

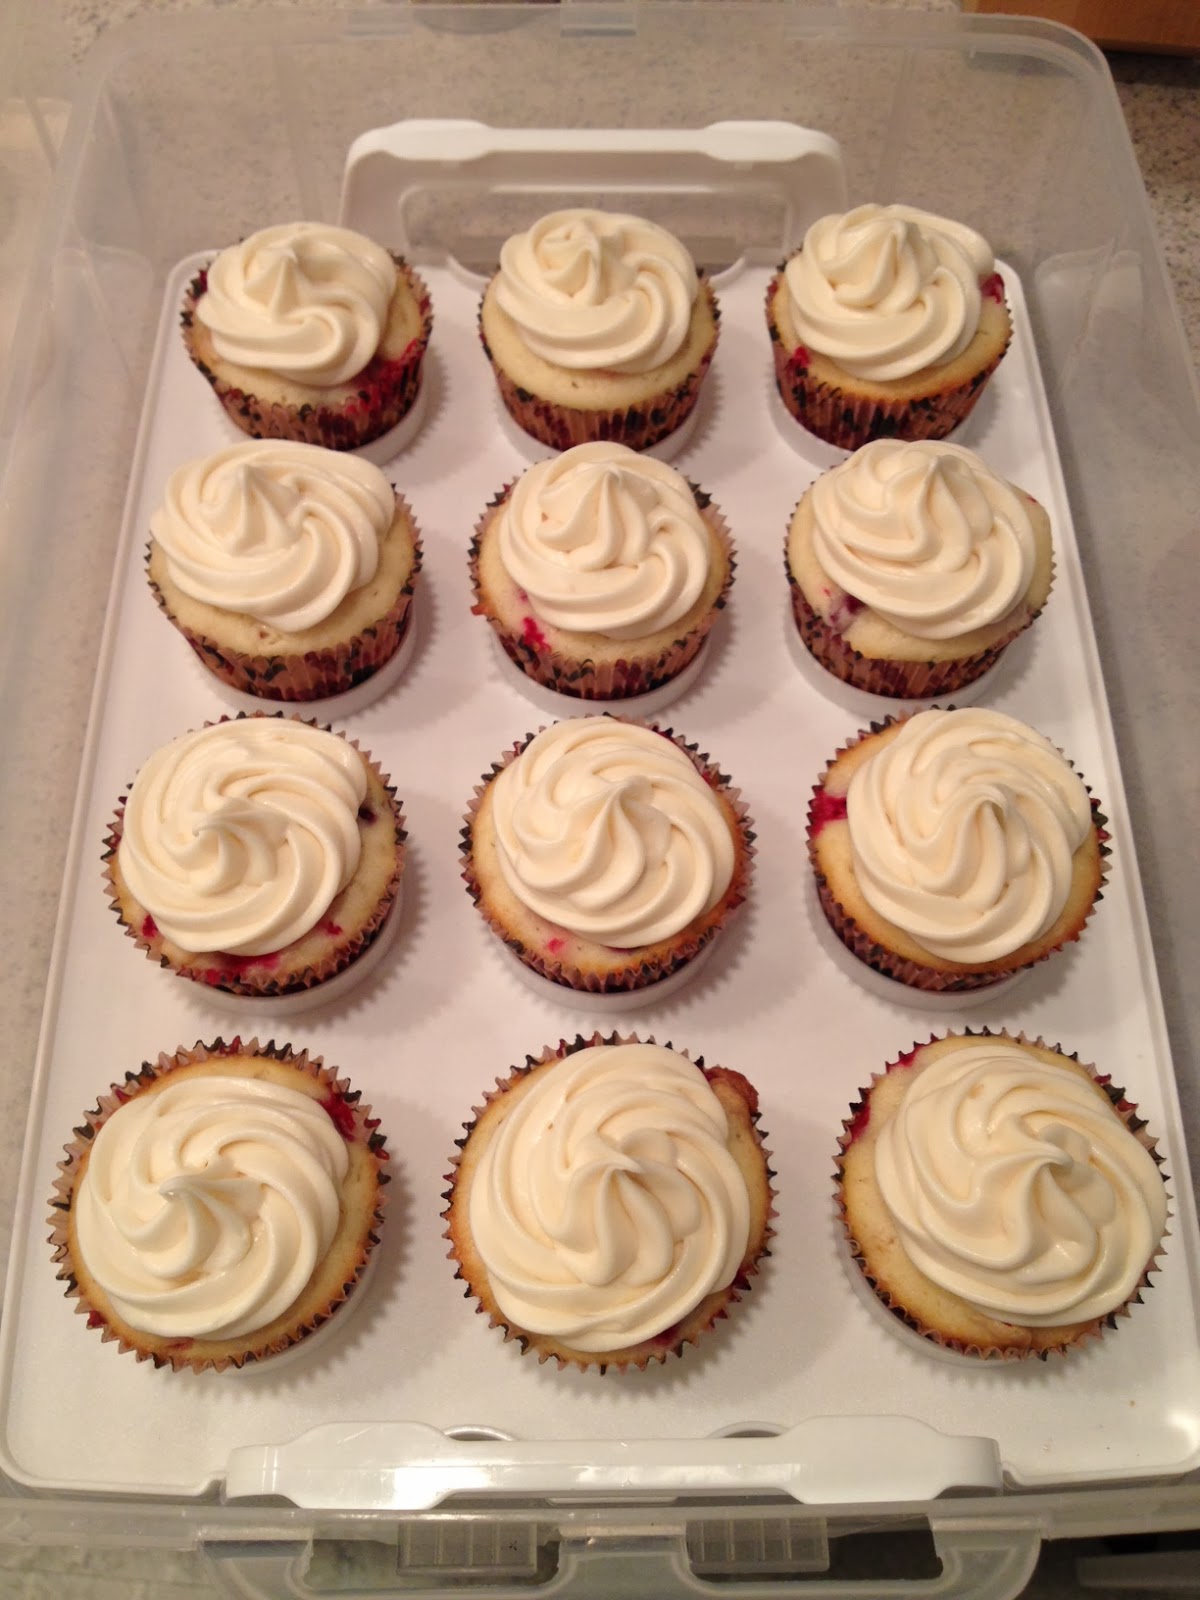
My prepping started yesterday when I started making a pumpkin ginger cheesecake. Water from the water bath got into the pan and sort of ruined the crust. Everything else baked up nicely, but I think I'll try making it again before I post about it. The flavors were great, but the crust was just a big ginger mush. Then, today, I got up at 8 and started the cupcakes. This recipe was great for today because it only made 16 cupcakes, and I had everything for it except for butterscotch chips and caramel. I even had the bananas, I didn't even have to choose this recipe because I had bananas, I wanted to make these and it just so happened I had bananas. It was easy and quick, since I modified it and made a basic buttercream, but my buttercream ended up being super thick. It was so thick my hands hurt trying to ice them. I was happy to have this recipe go smoothly...

...until during transport when the case got bumped and turned over almost all of the cupcakes.....

I guess Thanksgiving wasn't my holiday for baking this year. My cheesy potatoes that I always make for family occasions came out great, but that's a no-brainer.

Banana Caramel Cupcakes
adapted from Susi's Kuchen und Backen Adventures

1 and 1/2 cups cake flour
3/4 teaspoon baking soda
1/2 teaspoon baking powder
1/2 teaspoon salt
3/4 teaspoon cinnamon
2 bananas, mashed (about 1 cup)
1/3 cup buttermilk
1/2 teaspoon vanilla extract
6 tablespoons unsalted butter, at room temperature
3/4 cup packed dark brown sugar
2 large eggs, at room temperature
1/2 cup butterscotch chips


1 and 1/2 stick of unsalted butter, room temp
4-5 cups powdered sugar
1 tsp vanilla
4 tbsp. heavy cream
1/3 cup caramel sauce

1. Preheat oven to 350 and line 16 muffin tins with cupcake liners.
2. In a medium mixing bowl, whisk together the flour, baking powder, baking soda, salt and cinnamon.
3. In a small mixing bowl, mix together the mashed banana, vanilla and buttermilk.
4. In the bowl of a stand mixer, cream together the butter and brown sugar until fluffy.
5. Add the eggs, one at a time, fully mixing in each. Scrape down the sides of the bowl if needed.
6. Add the flour mix in two batches, alternating with the banana mix. Mix until fully combined.
7. Stir in the butterscotch chips.
8. Divide evenly into liners, filling about 2/3 full. Bake for 20 minutes or until a toothpick comes out clean.
9. Let cool.
10. To prepare the frosting, beat the butter until smooth and creamy. Add powdered sugar, one cup at a time, with the mixer on low. After a cup or two, add vanilla and 2 tbsp heavy cream. Add more powdered sugar and add more heavy cream. Add in the caramel sauce and mix until combined. If you want your frosting smoother, add more heavy cream, one tablespoon at a time until your desired consistency. 
11. Frost cupcakes and drizzle with extra caramel sauce.

The cupcakes came out very moist and sticky, and were hard to peel the liners off of, but they were delicious. I think next time I would make a different banana cake that is lighter and not so much banana bread like.


Saturday, November 23, 2013

Chocolate Chunk Gingerbread Stout Cupcakes

In a previous post this week, this one about the honey and beer chicken, I showed 3 different bottles of beer that I purchased for making that dish. One was the winner and the other two were going to be used for other recipes. Well, the hazelnut brown nectar ale didn't last. Dan drank that the other night. The gingerbread stout survived. I was going to use it to make my shepherd's pie with stout gravy , but I forgot that I'm going to Boston to see a play tomorrow, so I may not get time to make it. And the stout gravy that goes with it, is seriously the best gravy ever. I would drink it if I could, by the gallon. I always choose a different stout each time I make it, and it's delicious every time. My favorite so far is the milk stout I used once.

Anyways, I was going to make some honey hazelnut cupcakes to begin with, and then I bought that hazelnut brown nectar ale, so I thought to myself, "Boozy cupcakes instead of virgin cupcakes?!". Well, the ale disappeared. That didn't stop me though. I then thought to myself, "Gingerbread stout cupcakes, with some chocolate chunks perhaps?!" And so, these cupcakes were born. I even stuck with the honey buttercream I had planned to make. Gingerbread and honey go together well, right? The answer to that is: they do. I know this, because I baked these chocolate chunk gingerbread stout cupcakes and topped them with honey buttercream, and even a drizzle of honey for good measure.

These cupcakes almost didn't happen though. Dan and I started our day with a nice sleeping in (love when I get to do that) and then ran a whole bunch of errands. We needed breakfast, truck parts, a trip to the bank, Petco to exchange the broken remote control collar we bought for Lana, and some S hooks for the dogs new ID tags we bought. Tess is staying with my parents (which she does a couple nights a week because my parents can't go that long without seeing her), so Dan, Lana and I set out for our Saturday adventure. We got some coffee (breakfast), went to the bank and then headed to Petco. Lana was lucky enough that my friend was working in the grooming room, so she got a free nail treatment. She also met several other dogs and was howling up a storm. We grabbed some treats, a new collar and newly engraved ID tags for the dogs and headed home. We ordered some lunch and shortly after lunch my day headed downhill. I get chronic migraines, which are becoming more frequent lately. I can always tell when a dull headache is going to become a migraine, and today was one of those time. Off went the lights, off went the TV, and my afternoon/early evening was spent laying in the quiet darkness. I would say that 50% of the time, when I start recovering from a migraine I either get a surge of energy for a while before I crash again, or I just lay like a slug, feeling like I got hit by a truck for the rest of the night.

I got a surge of energy and these cupcakes came to be. Now that you've had a recap of my day (and my health), I bet you want the recipe. I bet you want to know how good these came out. This is another doctored box mix, which may have been while I was able to throw them together. Just a box of cake mix and the ingredients it called for (eggs, oil and water). Except, I replaced the water with stout. Voila!

Yup. They taste as good as they look!


Chocolate Chunk Gingerbread Stout Cupcakes w/ Honey Buttercream
from me and the frosting idea from Half Baked Harvest
made 22 cupcakes

1 box yellow or white cake mix (I had a sugar free yellow mix)
3 eggs
1/3 cup oil
1 cup stout (I used Sam Adams Merry Maker Gingerbread Stout)
1 to 1.5 cups chocolate chunks

1 cup (2 sticks) unsalted butter, room temp
1 tbsp. pure vanilla extract
1/2 cup honey
3-4 cups powdered sugar
4-5 tablespoons of heavy cream

1. Preheat oven to 325 and line 2 cupcake pans with liners.
2. In the bowl of a stand mixer, combine the cake mix, eggs, oil and stout. Beat for 2 minutes until smooth and combined.
3. Fold in chocolate chunks. Divide into cupcake liners and bake for 20-22 minutes. Let fully cool.
4. To make the frosting, in the bowl of a stand mixer, beat together the butter, vanilla and honey until smooth and fluffy. Add the powdered sugar, one cup a time, starting with the mixer on very low speed. Once the sugar is slightly combined, you can increase the speed. If you don't start on low speed, you'll get sugar everywhere (trust me!).
5. To get the desired consistency you want, add cream, one tablespoon at a time, until the frosting is the way you want it. I used 5 tbsp for a smoother, creamier frosting. It was still pretty thick though.


Let me tell you, these are fantastic! As they were baking you could smell the gingerbread. The stout itself has a slight and bitter gingerbread taste (in my opinion, but I am no stout expert). When they came out, it was a warm waft of gingerbread with a big kick of beer aroma. I didn't mind it one bit. The frosting is very sweet due to the honey on top of the sugar, but it paired up very well with the gingerbread cake. The bitterness of the stout off-set the sweetness of the frosting, and the chocolate just gave a nice extra flavor. You can taste all of the different flavors as you eat it, and they go lovely together. The drizzle of honey on top is the icing on the cake (literally).

Cheers!


I know it doesn't look good, but trust me, it is...

Get that frosting ready!


Cupcakes dripping with honey? Yes please!

Thursday, November 21, 2013

Honey and Beer Chicken


 No, this picture does not signal a rough day or a drinking problem. It signals that my dinner recipe called for beer, I went to get a bottle of pale ale, and of course, had to try others I saw. Variety is the spice of life, right? I am no beer connoisseur. I drink Bud Select 55. The lightest (and what most say is the most tasteless) beer. "Taste's like tinted water" they say. Eh, I enjoy it. It had 55 calories and has the same effects on me as any other beer does. If I go for a fancier beer, I like pale ales and fruity beers. I've been into the Curious Traveler Strawberry Shandy lately, even though summer is over...

I did a taste-testing of all three, just be sure I chose the right one for the recipe. And yes, we own shot glasses and drink glasses, but they're still packed up from the move with no room in the liquor cabinet for them. So, my little measuring shot glass had to do. Don't judge.

Sam Adams Merry Maker Gingerbread Stout

Sam Adams is a maker I don't usually prefer. I've tried so many varieties, and have never found one that I would ever ask for a second bottle of. When I grabbed this bottle, I almost didn't notice that it was Sam Adams. I also started to re-think if I should buy it or not, since I never really like Sam Adams. But, it's the fall, and it's a gingerbread stout, so why not? It has a nice dark color and a slight (and bitter) hint of gingerbread in my opinion. It also left a lingering aftertaste that left me immediately wanting to cleanse my palate. I'm not a big fan of stouts to begin with (remember, Select 55?), unless it's used in my stout gravy for my shepherd's pie. Which by the way, I will be making this weekend just so I can use this in the gravy. 

Rogue Hazelnut Brown Nectar

Hazelnut is not something often found on bottles of beer, so obviously I chose it. It has a nice dark tint, but wasn't as bitter as I was expecting. It had a nice hint of sweetness with a great smooth nutty malt flavor. As far as a darker beer goes, I could drink this. I could also use this in a cupcake recipe. The gears are already turning....

Berkshire Brewing Company Steel Rail Extra Pale Ale
Here's the pale ale I went looking for in the first place. It was nice and light. You could definitely taste the hops, but it wasn't overwhelming like a lot of extra pale ales. This one won the vote for tonight's dinner. Good thing I already plans for the other two bottles. That is, if Dan doesn't get to them before I can use them.

Honey and Beer Chicken

4 boneless, skinless chicken breasts
salt and pepper
2 tbsp canola oil
1 small shallot, sliced
1/2 cup beer (whatever kind you prefer)
2 tbsp soy sauce 
1 tbsp. dijon mustard
1 tbsp honey

1. Season chicken with some salt and pepper.
2. Heat a skillet over medium-high heat. Add oil and swirl. Add chicken and cook for 6 minutes per side until cooked through. Remove from pan and keep warm.
3. Add shallot. Cook for 2 minutes. 
4. Combine beer, soy sauce, mustard and honey and whisk together. Add to the pan.
5. Scrape the pan to scrape up those brown burnt bits that are there. Let the liquid boil until it reduces down to about a 1/2 cup.
6. Return chicken to pan and turn over to coat with sauce.


This recipe was delicious. The second you whisk up the beer, soy sauce, mustard and honey you can just smell how good it will be. I recommend only one tablespoon of soy sauce though, it was a bit salty for me. I love a good and easy chicken recipe.

Now, I'm off to go watch my cousin who's in the local high school production of Les Miserables. She plays a prostitute. Yep, my 17 year-old (baby) cousin is playing a prostitute. The good thing is, the high school's theater program is amazing and gives Broadway a run for its money. 


Wednesday, November 20, 2013

Carnitas Pizza

Every now and then, I get a meal idea in my head. It's one where I build my own recipe. Once it's in there, I have to test it out to see if it was a good idea. I had already decided tonight would be a make-your-own pizza night. Then, Dan changed a shift at work, so he had to work tonight. No big deal, making a pizza for one is just as easy. But, a week ago, I decided I wanted a fancier pizza. You know, not your ho-hum pepperoni, or my favorite Hawaiian. I wanted to get creative, but still make it a quick and easy process, since that's what pizza night is all about. Top a crust, bake it and eat it. So, what would this fancy pizza entail?

In college, out at UMass Amherst, there is the greatest pizza place of all time - Antonio's. You could buy almost any imaginable kind of pizza by the slice until 2am, and it was located right in the town center amidst the bars. Talk about the best money-making plan ever! My three favorite kinds of pizza were tortellini, potato bacon, and BBQ steak bacon. They also this steak fajita style pizza with the best shredded steak and drizzled with creme fraiche. For some reason, that slice stuck in my mind, and I decided to make my own fajita-style pizza, except with some carnitas. So, I got to work researching some different ideas, and then building my own. The only recipe I followed was the one to make the carnitas a day ahead, which can be found going here, or by going to my previous post. Yes, this is a two-day recipe for this pizza, but the first day includes a crock pot recipe that took me 5 minutes to prepare, 5 minutes to shred and 3-4 hours to smell the carnitas cooking all afternoon. I'll take the ten-minute total prep I needed to make the carnitas a day ahead of time, because when it came to making the pizza tonight, I spent another 5 minutes. One minutes to take some leftover carnitas and put it on a pan and another 4 minutes to throw it under the broiler to crisp it up ever so slightly.  What else did I do to prep this pizza? Spent another 10 minutes dicing up some shallots and green pepper and sauteing them. All-in-all, this pizza took about 15 minutes from start to finish, with all ingredients prepped and ready to go. Seriously, this pizza is a pre-made crust, some creme fraiche and cheese, a good dose of carnitas, peppers and shallots and some seasoning to give it a little kick. The seasoning is just an adapted version of the seasoning I used when making the carnitas. This is what you get:


Carnitas Pizza
from my brain

1 pre-made pizza crust (such as Boboli)
1/3 cup creme fraiche
1/4 tsp coriander
1/4 tsp cumin
1/4 tsp cinnamon
1.5 cups pre-made carnitas (see link to recipe above)
1 green pepper and 1 shallot diced and sauteed until soft
1 cup shredded cheese of any variety (I used a pizza blend)

1. To prep, be sure your veggies are sauteed. Crisp up your pork under the broiler if desired. And mix all spices together in a small bowl.
2. Preheat oven to 450.
3. Spread creme fraiche on pizza crust. Sprinkle with shredded cheese. Then, sprinkle half of the seasoning mix over cheese.
4. Top with carnitas, peppers and shallots. Sprinkle remaining seasoning on top of that. Add a little more shredded cheese if desired (I did!).
5. Bake for 8-10 minutes.

This pizza was delicious. I love the seasoning mix. You get a slight little taste of heat and flavor, but not overpowering. The creme fraiche gives the cheese a little bit of a lighter and fresher taste, and the pork is divine.

**For anyone who has never used creme fraiche, I found it in the specialty cheese section of my grocer. It tastes like sour cream, but with more of a cream cheese texture. When heated, it thins out A LOT. I found that out when I went to heat a good spoonful to drizzle on the pizza. Even 10 seconds in the microwave turned it into complete liquid. So when you bake the pizza, it will seem to liquefy and sort of melt into the crust. It still tastes delicious, just changes texture as it cooks!


Tuesday, November 19, 2013

Crock Pot Carnitas

How do you turn this


Into this?


Unless shredded pork is smothered in BBQ sauce, I usually don't want much to do with it. It's all about flavor for me. Needless to say, when I thought of making carnitas (and yes, I know, this is not your traditional carnitas), it took me a long time to find a recipe that sounded like it would be flavorful enough. Not to mention I came across about 10 paleo recipes for pork in the crock pot. I don't follow any of those (what I consider) crazy food fads, so it was on to the next recipe.

Finally, I found one that seemed flavorful enough and quick enough to throw together, not to mention I already had all ingredients except for the pork.

I strayed only slightly from the recipe. I used 2 smaller roasts instead of one larger one. I also just used 1 can of chicken broth rather than 2 full cups. I kept all seasonings the same. When reading the reviews, a lot of people doubled or tripled the seasoning, or omitted the cinnamon. I think if you doubled the seasoning it might be a little too strong. And, the cinnamon was fine, some people seemed to notice it more than the other flavors, but I didn't agree with that opinion.

Crock Pot Carnitas
from All Recipes

2 bay leaves
1 tsp salt
1 tsp garlic powder
1 tsp cumin
1/2 tsp dried oregano
1/2 tsp coriander
1/4 tsp cinnamon
4 lbs pork shoulder or pork roast
1 can chicken broth

1. Place 2 bay leaves on the bottom of the crock pot.
2. Mix all seasoning together in a small bowl.
3. Place pork on top of bay leaves. Sprinkle seasonings all over pork.
4. Add the broth around the pork, trying not to rinse off any seasoning.
5. Cook on high for 4-5 hours or low on 10 hours.
6. Shred and serve however.


Monday, November 18, 2013

Beef and Bacon Pasta

I just spent 6 hours grading student work and planning vocabulary lessons. Somewhere in the middle I made dinner too...

This weather is really throwing me off. Usually I plan lots of comfort food and cold-day meals for November. Granted, I'll eat a baked pasta dish anytime, but it's a great meal for a cold night. Tonight was not a cold night. It was in the low 60s today...oh well.

I knew if I was going to make a pasta dish with red sauce (which Dan doesn't tend to prefer), that it needed to be packed with some meaty goodness. I sort of overlooked the recipe a bit and added more pasta, beef and bacon than called for. In this case, that wasn't a bad thing, it was a perfect thing. We also have plenty of leftovers, which is great since Dan has class tomorrow so I don't have to cook again! Though I will because I have something planned....

The sauce in this was great, but I would maybe do a tad bit less of the balsamic vinegar. I know, I know. I know that anyone who has followed this blog has read about my love for balsamic vinegar. I would drink it if I could. But it just really stood out in the sauce rather than blending in nicely with everything else. The sauce had a nice sweetness to it, which I enjoy in a red sauce, especially when paired with some salty bacon.

Beef and Bacon Pasta
ever so slightly adapted from Goodies a Volonte

1 box rotini
1 can crushed tomatoes
5 garlic cloves, minced or mashed
2 tbsp balsamic vinegar
2 tbsp Italian seasoning
2 tbsp Worcestershire sauce
1 tbsp olive oil
pinch of salt
1 tbsp sugar
pinch of black pepper
1/4 tsp cayenne pepper
1 medium yellow onion, diced
8 strips of bacon roughly chopped
1 lb. ground beef
2 cups mozzarella and cheddar cheese, shredded

1. Preheat oven to 400.
2. Cook pasta according to package for al dente. Drain and rinse with cold water.
3. Mix the tomatoes, vinegar, worcestershire, garlic, Italian seasoning, salt, sugar, peppers and oil together in a medium mixing bowl.
4. Heat a deep skillet to medium-high heat. Add a little bit of oil and cook onions until slightly golden and soft. Remove onions and set aside.
5. Add bacon to pan and cook until slightly crispy. Add beef and cook until browned and juices are mostly evaporated.
6. Return onion to pan and add sauce. Mix everything together and cook for 2 minutes.
7. Add pasta and toss in the sauce.
8. Put pasta mix into a large baking dish. Top with cheese and bake for 20 minutes until cheese is good and melted.

Most of my casserole dishes are currently in use, so you will notice in the pictures I used a foil pan I had.


Thursday, November 14, 2013

Easy Beef Noodles

I always wish I could focus my dinners into some sort of category. Weight Watchers friendly, Under 30 minutes, Budget Friendly....you know, some sort of theme. But, I'm all over the place when it comes to cooking. Quick meals and budget meals should be my focus however. I don't get a huge window of time when the dogs are calm enough for me to cook if Dan isn't home to entertain them, so quick meals are great. As for budget meals....we just bought a house, we're getting married next year, and it's the winter and we have oil heat. Enough said on that I think. I definitely need to focus on budget meals and better grocery shopping habits.

Tonight's meal was quick and pretty cheap. Which was great, because Lana was off the wall all afternoon and we leave to go to the vet in about 10 minutes. And cheap? Do I need to explain why saving money is a good thing?

Easy Beef Noodles
adapted from Kitchme

1 lb. stir-fry steak
2 tsp. sesame oil, divided
2 cloves garlic, minced
1 can cut mini corn
handful of snow pea pods
1/2 cup shredded carrots
3 packages beef ramen noodles, with seasoning packets
2 and 1/4 cup water
1 tbsp. soy sauce

1. Heat 1 tsp of oil over medium-high heat in a large skillet. Add steak and cook for 2 minutes. Remove from pan and keep warm.
2. Heat remaining oil. Add garlic and veggies. Saute for 2-3 minutes. Remove from pan and keep warm.
3. Add water to the pan with the ramen seasoning packets. Bring to a boil.
4. Break noodles in half and add to the pain. Cook until most of the liquid is absorbed.
5. Add the beef and veggies back in. Stir in the soy sauce and cook until everything is heated through.


Off to the vet we go!


Wednesday, November 13, 2013

Buffalo Chicken Meatballs

Remember how we talked yesterday about my weekend filled up and plans changed? That happened today. For the better, but plans changed yet again. I decided to make these meatballs at some point this week. At first, it was going to be Monday, but we had the memorial service. Then, it was going to be last night, but mom invited me over for some homemade chicken pot pie, and I never turn down a pot pie. So I figured I'd make them tonight, even though Dan was scheduled to work, because they'd be fine as leftovers. Well, Dan isn't working tonight, so that's what worked out better. I had a dinner for him that he would like. A lot of times when he has class or is working, I cook something he won't like since it's just me eating.

These were really good. The original recipe poster had stated that they are a pretty wet meatball, so they bake up pretty moist, which is true. Ground chicken tends to be mushier when mixed up, so when you add the hot sauce and egg, and only a little bit of bread crumbs, it certainly stayed pretty moist. Forming them into some beautiful round meatballs wasn't going to happen, so I just mushed them up into a semi-round shape and baked them. They were going to be squished between some whole wheat buns anyways...

The flavor was great. Since I used my whole pound of ground chicken instead of just a half pound, I upped some of the other ingredients. The recipe below is my recipe that I used. It was just the perfect amount of heat. I like buffalo, but I'm a big wuss when it comes to heat (spice-wise and weather-wise). Most buffalo tenders leave me panting and trying to down as much liquid and eat as much bread after as possible, and the burn lingers on my tongue and lips for hours. I didn't quite double the hot sauce for this, because I knew I didn't want super-hot buffalo, I wanted to taste the hot sauce and also taste the ranch that's mixed in there. Topped with some Swiss cheese and blue cheese dressing, it was delicious!

Buffalo Chicken Meatballs
adapted from Chocolate Moosey

1 lb. ground chicken
1/3 cup hot sauce
2 tbsp. dried minced onion
2 tbsp. ranch dressing powder mix
2 cloves garlic, minced
3 tbsp. bread crumbs
1 egg

sub rolls

Optional:
cheese for subs
blue cheese dressing for subs

1. Preheat oven to 400. Line a baking sheet with parchment paper or foil and coat with cooking spray.
2. In a large bowl, combine all ingredients.
3. Roll into meatballs (I got about 15 out of this).
4. Bake for 20-25 minutes.
5. Serve how you like them. I served mine on whole wheat sub rolls. Topped with a couple of thin slices of Swiss cheese, I threw it under the broiler for two minutes and let the cheese melt and roll toast. Drizzled on some blue cheese dressing and ate it up!


Goopey meatballs


Tuesday, November 12, 2013

Cranberry White Chocolate Cream Cheese Cupcakes

I hope everyone had a great Veteran's day! I had planned on cooking/baking more over the weekend, but life being what it is, kept me pretty busy all weekend. Saturday, at the last minute, I decided to go to a comedy show fundraiser for the First Skin Foundation. Some people who I grew up with added a new member to their family a couple of years ago and he was born with a very rare skin disease. He is in full recovery, but they wanted to do something to support the First Skin Foundation, so there was a comedy show with a semi-local comedian, Bucky Lewis. It was an absolute riot, I was glad I decided to go.

So there was my Saturday night, which I usually spend at home with the pups cooking up something.

Then, Sunday, I went to visit Dan for lunch and went to look for some holiday decorations at Michael's. When did Michael's become so expensive? I feel like a lot of their home decor seemed very pricey. I ended up leaving with a new frosting gun (woo woo!) and a bunch of cupcake liners that were on sale. Not bad I suppose. Then, Dan ended up home early instead of going to hockey. So we got some quality time in on a Sunday, which almost never happens.

That leaves us to yesterday, Veteran's Day, which I had off. I had planned on baking these cupcakes and bringing the leftovers to work. Well I forgot that Dan and I had a memorial to go to for someone he knew who recently passed away. So, I got my errands in during the day and then we went to the memorial. I should also mention I had a headache from Friday until Sunday morning, which then returned yesterday. So by the time we got home, after decided to go buy a clicker control collar for Lana, I was all but in the mood to bake. I figured I could bake them tonight, which I finally did.

As great as it was to be busy over the weekend, I always hate when I have extra time to cook and never use it. Oh well, some of it got done today.

These cupcakes are incredibly flavorful. The cupcakes are soft, but dense, and you can really taste the cream cheese in the batter. It gives it a cheesecake type flavor, which is dotted by some white chocolate chips, and then you have the tart cranberries bursting through everywhere. The frosting was very, very smooth. If left out or if you are serving these somewhere warm or in warm weather, I'm not sure this frosting would be so great. You would have to add more powdered sugar to thicken it up. I stored these in the fridge after frosting them so they would keep better due to the cream cheese. When I go to serve them, I will let them sit out for about a half hour to come to room temp. The original recipe had a white chocolate mousse filling. For some reason, I thought I still had my bar of baker's white chocolate, but I forgot that I had used it recently. So, to improvise since I didn't have the good quality chocolate for the mousse, I threw in some white chocolate chips I had in the pantry to the batter.


Cranberry White Chocolate Cream Cheese Cupcakes with Maple Cream Cheese Frosting
adapted from Krissy's Creations

2 sticks unsalted butter, room temp
1 block (8 oz) cream cheese, room temp
2 cups sugar
3 eggs
1/4 tsp almond extract
1 and 1/2 tsp pure vanilla extract
2 and 1/2 cups cake flour
1 tsp. salt
1 tsp. baking powder
1/2 cup milk (I used 2%)
2 cups of cranberries, tossed in 1 tbsp flour
1 cup white chocolate chips

1 stick unsalted butter, room temp
2 blocks (16 oz) cream cheese, room temp
2 and 3/4 cups powdered sugar
2 tsp. pure vanilla extract
4 tbsp. pure maple syrup

1. Preheat oven to 350. Line 2 muffin pans with liners.
2. In the bowl of a stand mixer, cream together the butter and cream cheese, until fluffy, about 3 minutes.
3. Add the sugar and beat to combine.
4. Add eggs, one at a time, mixing each until combined. Be sure to scrape down the sides of the bowl with a spatula and mix everything in.
5. Add in almond and vanilla extract.
6. In a separate medium bowl, whisk together the cake flour, salt and baking powder.
7. Add the flour mix to the batter, alternating with the milk. (Flour mix, milk, flour mix, milk, flour mix)
8. Fold in cranberries and white chocolate chips.
9. Use a cookie scoop to scoop the batter evenly into the liners. Bake for 25-35 minutes.
10. Remove from oven and cool completely.
11. To make the frosting, cream the butter and cream cheese together in the bowl of a stand mixer.
12. With the mixer on low, add the powdered sugar, one cup at a time, mixing until fully combined. Add the vanilla and maple syrup and mix well.
13. Frost cupcakes. Garnish with cranberries if desired. Eat!


Tuesday, November 5, 2013

Southwest Spaghetti Squash

Okay. I'm working on getting back into healthier recipes. Tuesday nights are great, because Dan has class, so I can make more vegetarian dishes, or at least dishes with more veggies in them. One of the veggies that I love that Dan will never, ever, eat (not even a taste), is spaghetti squash. Well, all squash really. Dan can't take the mushy texture of them, so never mind the stringy spaghetti squash. Overall, I find spaghetti squash bland, so whatever I pair it with needs plenty of flavor. I've used it in place of regular spaghetti with some red sauce; I've paired it with spinach and cheese. I'm always game for some Mexican food (flavors Dan never wants to eat), so this recipe is great when I'm cooking for myself.

I changed it very slightly, but only by omitting the cilantro and using yellow pepper instead of red pepper. Cilantro always comes in gigantic bunches at the store, and I will never use the amount I get. Every time I've ever bought it, I waste about 3/4 of it. I also used Mexican cheese on top because that's what I had in the fridge. I found another way to serve this dish as well. A way that adds a little more sustenance and really makes it a Mexican style dish. The dish is plenty filling as is, so don't think that because I found another way to serve it that needs any improvements. It's great the way the recipe intends it to be. I also had enough filling to fill 2 whole squashes, so you'll have some leftover filling to enjoy later!

Southwest Spaghetti Squash

1 small to medium spaghetti squash
1 tbsp. olive oil
1/2 red onion, chopped
1 bell pepper (any variety) chopped
1 jalapeno, minced
2 garlic cloves, minced (I sliced mine)
1/2 tbsp. ground cumin
1/2 tbsp. oregano
1/2 tbsp. chili powder (I used a little less, I didn't want too much heat)
1 (15 oz.) can black beans, rinsed and drained
1 cup frozen corn, thawed
1 squeeze of lime juice
1 cup grated cheddar cheese (or any variety)

1. Roast the squash. Cut the squash in half and scoop out the seeds. Drizzle with some oil, salt and pepper and roast at 375 for 45-60 minutes. Let cool and scoop out the flesh "spaghetti". Set aside and save the shells.
2. Heat olive oil in a skillet over medium-high heat. Add the onion, pepper, jalapeno and garlic, saute for 2 minutes.
3. Add the spices and stir to coat. Cook for 1 minute.
4. Add the beans, corn and lime juice. Add the squash and cook until everything is heat through. Spoon filling into the squash shells and top each with half the cheese.
5. Broil for 2-3 minutes until cheese is melted and bubbly.


Oh and were you wondering what the other way to serve it is?

As I was looking at how much leftover filling I had (and the other half of the squash I have for lunch tomorrow), something just dawned on me. This might be good inside of a tortilla, like a taco. I decided to test it out.

I took some filling and put it on a tortilla. I topped with some cheese and nuked it in the microwave for 30 seconds. I topped with a dollop or two of sour cream and rolled it all up.

It was delicious! I love finding different style of tacos and fajitas, and I'm pretty obsessed with Mission's Carb Balance Tortillas. They're healthier than others and the softest things on the planet. Seriously, it's like eating a taco or fajita that's been wrapped in a cloud. I think I kind of preferred it taco-style rather than just plain, but I'm a carb-a-holic, so if there's a way to add more carbs, I'll probably always prefer that. I guess I need greater will power...


Monday, November 4, 2013

Turkey and Stuffing Rollups

It's November.

That means the holidays are upon as in a matter of days. Thanksgiving is coming. I am welcoming of Thanksgiving. I absolutely love to browse Thanksgiving recipes, but the thought of hosting Thanksgiving at my home scares me. I love to cook, but not under pressure. And making a turkey? I have such a fear that it will dry as a bone. Luckily, Dan and I go to both our families for Thanksgiving, so I get limited to side dishes and desserts to make. I'm good with that.

This meal kicks off my November dinners, and what better to meal to make than a sort of Thanksgiving supper? It has the flavors of Thanksgiving with the ease of a weeknight meal on your table with minimal work. I used some nice thick-cut deli turkey, boxed stuffing and boxed mash potatoes. I was in the kitchen for maybe 10 minutes. Of course, you can always make your own stuffing and some homemade sides, which would always be better, but for a Monday night, 10 minutes in the kitchen is okay with me. I chose an oven roasted style deli turkey, but you could spice things up with some flavored turkey, like honey maple turkey, which I buy for my sandwiches. I bet that with some cornbread stuffing would be divine. A little sweeter hint to it than the traditional. I found that getting 1 pound of the turkey meat sliced thick was exactly the perfect amount. I had two big spoonfuls of stuffing leftover, which I promptly ate...

Oh, and don't forget the gravy. I used a jarred turkey gravy, but you can always make your own. Homemade is always better if you want to put in the time.

Turkey and Stuffing Rollups
from Mommy's Kitchen

1 lb. thick-sliced deli turkey
1 box stuffing mix, prepared according to box directions
1 jar turkey gravy

1. Preheat oven to 350 and grease a 9x13 baking dish.
2. Place a large spoonful of stuffing onto a slice of turkey and roll up. Place in the baking dish seam side down. Repeat with remaining turkey slices and stuffing.
3. Cover with gravy.
4. Cover dish with foil and bake for 30 minutes until bubbly.

Serve with sides of your choice.


Sunday, November 3, 2013

Coffee Cake Snickerdoodle Cupcakes

It's Sunday, so of course that means cupcakes. I also had a reason to share them rather than just making them and hoping everyone at work eats them. There was so much food here tonight, that only a few of the cupcakes went. I'm sure Dan will eat a few more before bed, but there will still be 10 or so to bring to work tomorrow.

As with most of my recipes today, this had some pre-made items in it that helped save on time. This is a doctored box mix, which have actually been working out well for me lately. It's always funny (and satisfying) when people ask me if I made the frosting from scratch. I always do, I can't remember a time I used a canned frosting. Frosting is so easy to make, especially a basic buttercream. You just need softened unsalted butter and powdered sugar. Add whatever flavoring you want to it. The only things to be wary of is time spent mixing it and it's consistency, which play into each other. Consistency is easy to take care of. I always have at least milk on hand, but if I know I'm going to make cupcakes, I'll usually make sure I have heavy whipping cream on hand as well. If the frosting gets too thick, just add a tablespoon at a time of some milk or cream. If it's too thin because you added too much liquid, just add some more powdered sugar. Today's frosting was interesting. I don't usually like grainy, sugary frostings. You know, the ones where you can feel the sugar as you eat it. This one has brown sugar in it, which gives it a thicker texture and you can feel the brown sugar crystals in the frosting, but I really liked it. I think it's because it added to the overall taste, and it wasn't just a plain old grainy frosting.

What would I change about this recipe? I would add the streusel to the top of cupcake before baking rather than putting it in the bottom of the cupcakes. Because there's butter in the streusel, it caused the bottoms to be soaked in butter. It was still good, but I don't know. Then again, if I out streusel on the top, I wouldn't have the smooth tops to dip into the cinnamon and sugar, making it the snickerdoodle part. Hmmmm....

Also, today was a sad day in the kitchen. I finally broke my frosting gun to the point of no return. I had already cracked the large coupler, and broke the thumb rest on the handle, but it was still usable. Today, the pump part actually broke. Time for a new one. I find the guns so much easier than using a pastry bag. They can be a hassle to fill the barrels of the guns sometimes, but it makes frosting everything quicker and cleaner for me. These cupcakes were really good. You can taste the coffee cake flavor to them, and the frosting just gave a nice texture with the brown sugar and the cinnamon flavor.

Coffee Cake Snickerdoodle Cupcakes
from Beyond Frosting

For the streusel:
3 tbsp. unsalted butter, melted
1/2 cup brown sugar
1/2 cup flour
3 tsp. cinnamon

For the cake:
1 box yellow/vanilla cake mix
1 (3.4 oz) package vanilla pudding mix
3 eggs
3/4 cup milk
1/2 cup oil
3/4 cup light sour cream
2 tsp. vanilla extract

For the topping:
1/4 cup sugar
1 tsp cinnamon
3 tbsp. unsalted butter, melted

For the frosting:
3 sticks unsalted butter, room temperature
1/4 cup light brown sugar
3 cups powdered sugar
2 tsp cinnamon
3 tbsp heavy whipping cream
1/2 tsp vanilla extract

1. Preheat oven to 350. Line 2 muffin pans.
2. To make the streusel, melt the butter. In a small bowl, combine the brown sugar and flour. Add the butter and mix with a fork or pastry cutter until crumbly. Set aside.
3. To make the cake: In the bowl of a stand mixer, mix the cake mix and pudding mix together. Add the eggs, one at a time, making sure each is mixed before adding the next.
4. Add the milk, oil, sour cream and vanilla and beat on medium until well combined. Scrape down the sides with a spatula to be sure you get all the batter off the sides and up from the bottom. Since you start with dry ingredients and the eggs, the batter was very thick. I found it really stuck to the sides and bottom and needed a good scraping, so don't skip this step!
5. Pour a heaping teaspoon of streusel into each cupcake liner. Top with a big spoonful (about 3 tbsp) of batter. Bake for 18-24 minutes until a toothpick comes out clean. Let cool completely.
6. For the topping, combine the sugar and cinnamon on a small plate. Melt the butter. Brush the tops of each cupcake with the butter and roll in the sugar mix.
7. For the frosting: In the bowl of a stand mixer, cream the butter until smooth. Add the brown sugar and beat until combined.
8. Slowly add the powdered sugar, 1 cup at a time. When I do this, I turn the mixer down to low when I add it, and then turn to to medium when it won't splatter around.
9. Continue to beat on medium speed and add the cinnamon.
10. Add the cream and vanilla last, and increase speed to high. Frost cupcakes.